
Install NXLog Platform in an air-gapped environment
|
Air-gapped deployment is currently a Beta feature available to Premium customers. Contact NXLog Support for more information. |
This method deploys NXLog Platform on-premises on a Linux machine with no outgoing internet connectivity. It uses Podman and Docker Compose and provides the nxp_manage.sh script to manage your instance.
Before you begin, ensure that you meet the system requirements for an air-gapped deployment.
Install NXLog Platform
Follow these steps to install NXLog Platform:
-
On any internet-connected machine, sign in to your NXLog Platform account, or sign up for NXLog Platform if you don’t have an account yet.
-
Download the installer:
-
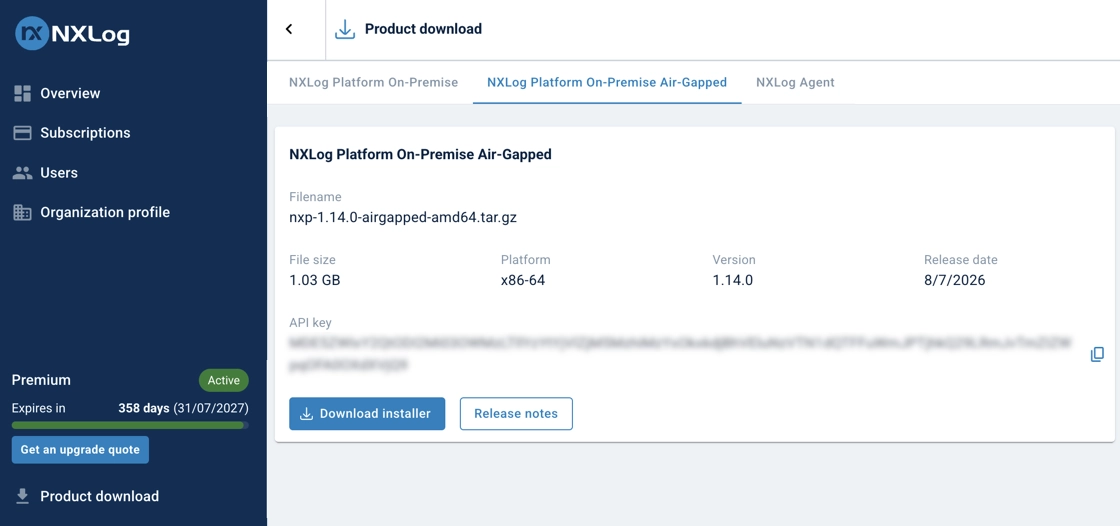
In the left navigation menu, click Product download.
-
Switch to the NXLog Platform On-Premises Air-Gapped view.
-
Download the installer.
-
Take note of the API key.
-
-
Copy the downloaded file to the NXLog Platform host machine.
-
If necessary, create a dedicated service account to install and manage NXLog Platform.
-
If you intend to use SELinux, make sure that it is installed and active before continuing:
$ sudo getenforce Enforcing -
Run the following command, replacing
x.x.xwith your version:$ tar -xvf nxp-x.x.x-airgapped-amd64.tar.gzThis extracts the following files:
-
The NXLog Platform installer:
nxp-x.x.x-onprem-amd64.sfx.sh -
The NXLog Platform container image bundle:
nxp-x.x.x-images-amd64.tar.gz -
The NXLog Platform offline documentation bundle:
nxp-x.x.x-docs.tar.gz
-
-
Run the following command, replacing
x.x.xwith your version, to install thenxp_manage.shcommand-line interface for managing your NXLog Platform instance:$ sudo ./nxp-x.x.x-onprem-amd64.sfx.sh -
Edit the configuration file
/etc/nxp.confas root. For example:$ sudo nano /etc/nxp.confThen, define or review the following settings and save the file.
Setting Description NXP_AIRGAPPEDMust be set to
truefor air-gapped deployments. This setting ensures that the installer does not attempt to access the internet to pull container images or perform other operations that require internet access.The default is
false.You must change this setting to truebefore running the installer, or it will attempt to access the internet and fail.NXP_API_KEYYour NXLog Platform API key.
NXP_DOMAINDomain name for accessing your NXLog Platform instance, in the format
subdomain.domain.tld.To avoid DNS conflicts with other services on your network, we highly recommend choosing a dedicated subdomain for NXLog Platform (such as
nxlog.example.comif your organization’s domain name isexample.com).NXP_SIZENXLog Platform deployment size. The accepted values are
small,medium,large, andxlarge. See the CPU and RAM requirements for each deployment size.The default is
small.DEFAULT_ADMIN_EMAILDEFAULT_ADMIN_PASSWORDEmail and password for the built-in NXLog Platform administrator user account. We recommend updating the default administrator user credentials at install time, but you can also change them later.
NXP_STORE_LOGSIf you intend to use the built-in NXLog Platform log storage database, you must set this value to
true. See the CPU and RAM requirements to understand how this setting affects the RAM allocation for NXLog Platform.The default is
false.NXP_BACKUP_LOCATIONDirectory where NXLog Platform creates backup files.
The default is
/srv/nxp/backup.NXP_DATA_LOCATIONDirectory where NXLog Platform writes and stores all data. Ensure that the directory has sufficient disk space, as mentioned in the storage requirements.
The default is
/srv/nxp/data.NXP_MINDER_AGENT_PORTTCP port where NXLog Platform listens for incoming NXLog Agent connections. If you change this setting after installation, see Change the NXLog Agent listening port.
The default is
5515.NXP_COMMON_NAMECommon name of the root Certificate Authority (CA) certificate. NXLog Platform generates this certificate during installation and uses it to generate certificates for your NXLog Agent instances.
The default is
NXLog Platform Root CA.NXP_PKI_CA_TTLValidity period of the root Certificate Authority (CA) certificate.
The default is
87600h(10 years).NXP_PKI_AGENT_TTLValidity period of agent certificates.
The default is
720h(1 month).NXP_PKI_AGENT_MAX_TTLThe maximum validity period for agent certificates. The value must be greater than or equal to the value set for
NXP_PKI_AGENT_TTL.The default is
8760h(1 year). -
Copy the NXLog Platform container images and offline documentation to the NXLog Platform base directory, replacing
x.x.xwith your version:$ sudo cp nxp-x.x.x-images-amd64.tar.gz /opt/nxp/ $ sudo cp nxp-x.x.x-docs.tar.gz /opt/nxp/The documentation bundle lets you access the NXLog Platform documentation from the NXLog Platform UI without outgoing internet connectivity. If you skip this step, NXLog Platform installs and runs normally, but the documentation is unavailable from the UI.
-
Run the following commands to install NXLog Platform:
$ sudo nxp_manage.sh wizard
$ sudo nxp_manage.sh install
The wizard deletes each tarball automatically if it finishes successfully. The installation might take some time, depending on the available system resources.
You will have NXLog Platform installed and running at this stage. Next, you must configure DNS to be able to sign in for the first time and register your instance.
Post-installation steps
Once you have installed NXLog Platform, we advise performing the following additional configuration steps immediately to tighten security and initiate important features.
Configure DNS
You need to configure the appropriate DNS records before you can access your NXLog Platform instance. You will likely need to do this on your corporate DNS server.
Create DNS A records for the following domain names and point them all to the IP address of the deployment machine, replacing nxlog.example.com with the actual domain you configured on /etc/nxp.conf while installing NXLog Platform.
-
platform.nxlog.example.com -
agents.nxlog.example.com -
relay.nxlog.example.com
For testing purposes, you can add the following entries to the hosts file on your workstation and on any machine running NXLog Agent.
Replace 192.168.1.123 with the IP address of your NXLog Platform host machine and nxlog.example.com with the domain you configured in /etc/nxp.conf while installing NXLog Platform:
# Your workstation must resolve the name for the service
# hosting the NXLog Platform UI
192.168.1.123 platform.nxlog.example.com

# Machines running NXLog Agent must resolve the names for the services
# hosting the NXLog Platform log collection and agent management
192.168.1.123 relay.nxlog.example.com agents.nxlog.example.com
Set up custom TLS certificates
By default, NXLog Platform uses self-signed certificates to serve the web UI and signing agent certificates. Refer to the instructions to Import custom TLS certificates.
If you skip this step, the browser will alert you that your connection is not secure when accessing the NXLog Platform web UI.
Sign in for the first time
Before you can sign in to NXLog Platform, you need to configure DNS.
After the DNS records are in place, open a web browser and navigate to your NXLog Platform URL, replacing nxlog.example.com with your domain:
https://platform.nxlog.example.com
Sign in to NXLog Platform using the credentials you defined in /etc/nxp.conf while installing NXLog Platform.
If you didn’t change them, use the default credentials for the built-in administrator account:
Username: admin@localhost.local
Password: NXLogPlatform_1
Register your instance
Register your instance and import the offline license file to activate NXLog Platform.
On your NXLog Platform instance:
-
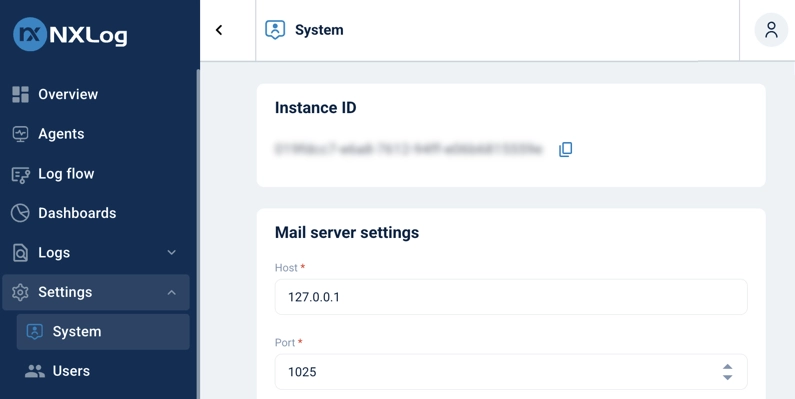
Navigate to Settings > System.
-
Take note of your Instance ID.
On any internet-connected machine:
-
Sign in to your NXLog Platform account.
-
On the Overview page, click Install NXLog Platform on-premises air-gapped.
-
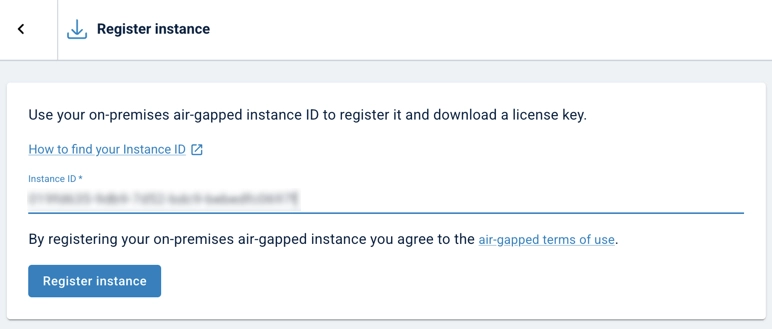
Click Register instance.
-
Enter your Instance ID and click Register instance.
-
Click Download license key.
On your NXLog Platform host, import the license file, replacing <instance_id>.license with the path to your license file:
$ sudo nxp_manage.sh license-import LICENSE_FILE=<instance_id>.licenseConfigure a mail server
NXLog Platform needs to connect to an SMTP server to send emails such as user invites, password reset requests, and system alerts. Without configuring an SMTP server, those features will be unavailable.
Refer to Configure a mail server for step-by-step instructions.
Harden the administrator account
If you haven’t changed the administrator account credentials during installation, we highly recommend changing them after you sign in for the first time. We also recommend enabling two-factor authentication (2FA) for the account.
-
Ensure that you have configured a mail server.
-
Follow the steps to Update personal information to change the administrator email address. We recommend changing the email address to one that you monitor regularly, as NXLog Platform sends important email notifications to the administrator.
After completing the change, use the new email address for future logins.
-
Follow the steps to Change your password for the administrator account.
-
Follow the steps in Activate two-factor authentication to configure 2FA for the administrator account.