Create your first configuration with the configuration builder
The configuration builder in NXLog Platform allows you to create an NXLog Agent configuration without writing the configuration yourself. It is a graphical drag-and-drop builder where you can select your log source, the destination you want to send your logs, and any actions you want to perform on the logs. NXLog Agent uses an Apache-style configuration file. It utilizes blocks similar to XML tags containing several directives.
Sign in to your NXLog Platform account to get started with this tutorial.
Prerequisites
To complete this tutorial, you will need:
-
A basic understanding of NXLog Agent telemetry data processing.
-
A Windows computer with NXLog Agent installed and enrolled to NXLog Platform.
Step 1: Create a new configuration
Navigate to Agents > Configurations, then click Add configuration. In the Configuration details panel, provide a name and an optional comment for your configuration.
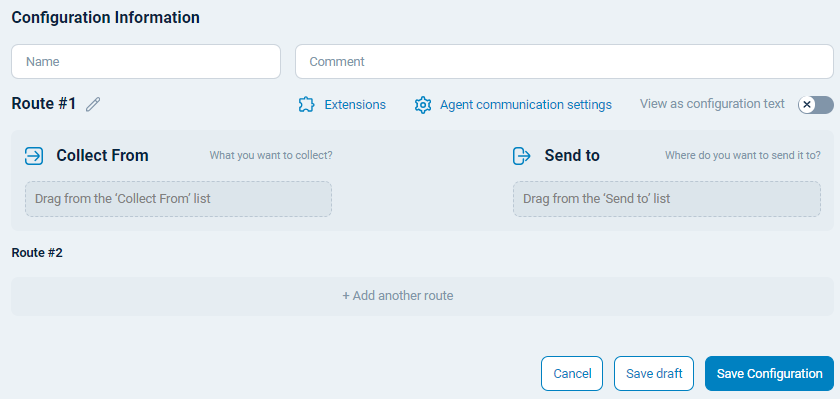
You are now ready to drag and drop input and output modules into your configuration or switch to the configuration text editor.
| You can always see your exact configuration by clicking the View configuration as text switch in the top right. Once turned on, you can view, edit, and save your configuration like editing it in a text editor. You can also drag and drop modules and actions from the left-hand side to the text editor. Certain configurations, such as constants and global directives, can only be defined through the text editor. |
| When you switch to the text-based editor, you will see that the configuration already contains the connection settings needed to connect your agent to NXLog Platform. Do not change these settings. |
Step 2: Define constants
You typically use constant values for directory paths, filenames, hostnames, regular expressions, or any values you will reference more than once within the configuration.
Use the following syntax to define a constant:
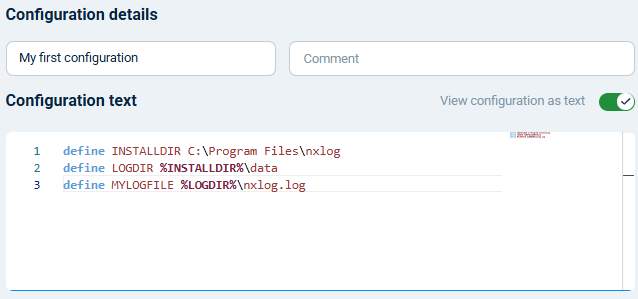
define <KEY> <VALUE>Start by adding the following constants to your configuration by switching to the text-based editor, as explained in the previous step. These three constants define the NXLog Agent installation and logging directories and the agent log file path. Line numbers 1, 2, and 3 in the image below.
Step 3: Set global directives
Global directives control the overall behavior of NXLog Agent. These include logging, batching, caching, and date format settings.
| The two global directives explained in this step are added by default when using the configuration builder, but mentioning them as part of the configuration is essential. |
The following is the syntax for defining a global directive:
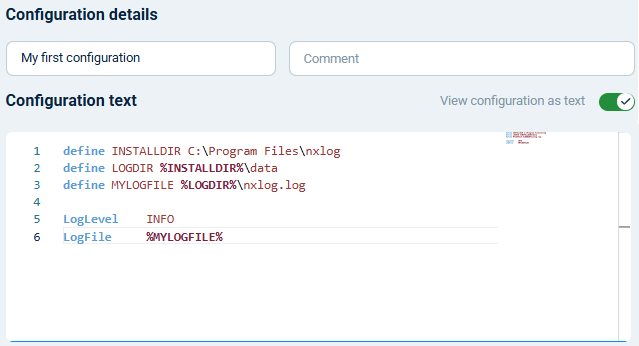
<DIRECTIVE> <VALUE>Continue building your configuration by adding the following two directives to configure the NXLog Agent LogLevel and LogFile path. Line numbers 5 and 6 below.
Step 4: Configure your data source
Input module instances define the sources from which to collect or receive telemetry data. Since we want to collect Windows events, drag Windows 2008/Vista and Later Event Logging from the Collect events snippet list and drop it on the Collect from slot. This utilizes the im_msvistalog input module.
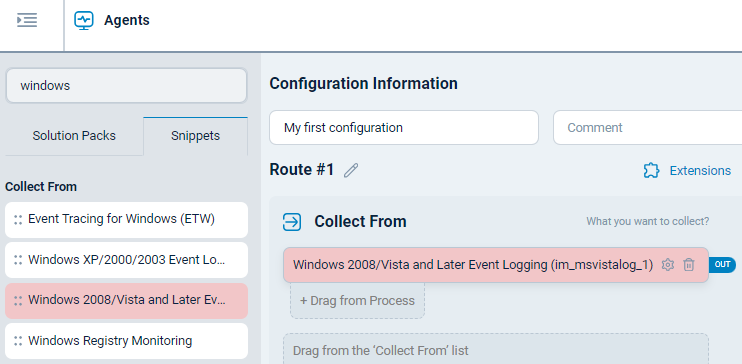
To further narrow down the events, we will configure the QueryXML directive of this module to only collect security event IDs 4624 (successful logon) and 4625 (failed logon attempt).
You can learn more about filtering Windows logs in our Windows Event Log integration guide.
Add the following log source to your input module by clicking the settings button on the log source you added, then copy the following XPath query to the QueryXML field.
<QueryList>
    <Query Id="0" Path="Security">
        <Select Path="Security">*[System[(EventID=4624 or EventID=4625)]]</Select>
    </Query>
</QueryList>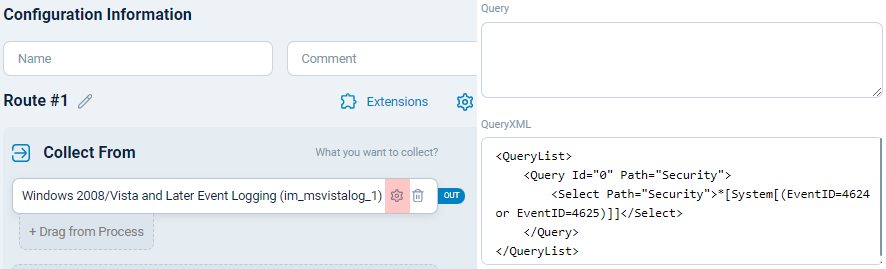
Step 5: Configure the output
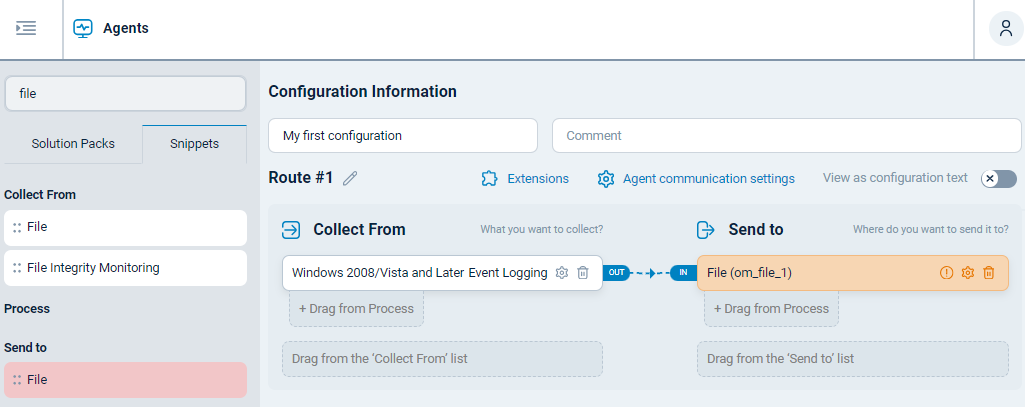
The next step is to configure the destination of your data with an output module instance. Destinations may include a file, a syslog server, SIEM, or NXLog Platform. For simplicity and to see results immediately, we’ll use the File drag-and-drop item from the Forward events snippet list, which utilizes the om_file output module to save the Windows Event Log records in a file.
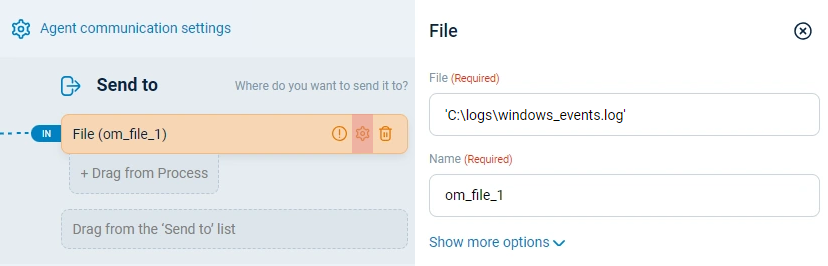
The only thing left in this step is to specify the path we need to collect logs from (C:\logs\windows_events.log).
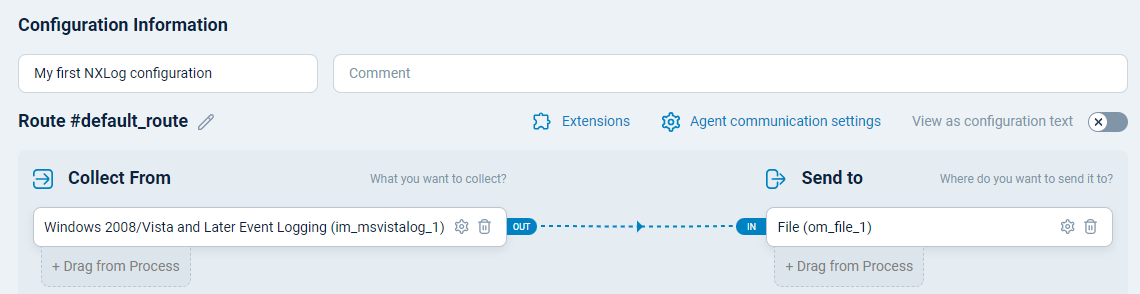
Add the output location by clicking the settings button on the log destination.
Your configuration is fully functional at this point. The below image shows what your screen should display.
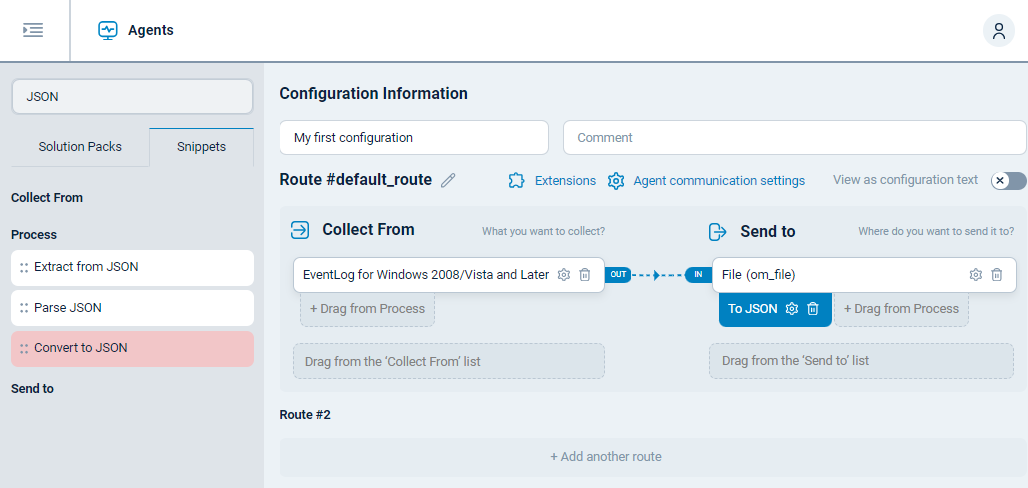
Step 6: Configure log processing
You can process logs further by parsing or transforming logs to a specific format. In this instance, you will use Convert to JSON, which utilizes the xm_json extension to convert Windows Event Log records to JSON format.
Step 7: Define the route
Finally, you need to define the flow and processing order of your logs.
In this case, you built your configuration within the default_route, which is automatically created, so nothing further is needed.
If you add more sources and destinations to this route, NXLog Agent routes all log data from your sources to each of the destinations.
When you are ready, click Save Configuration at the bottom of the page.
Your configuration is now ready to use! All you need to do is to assign it to an agent.
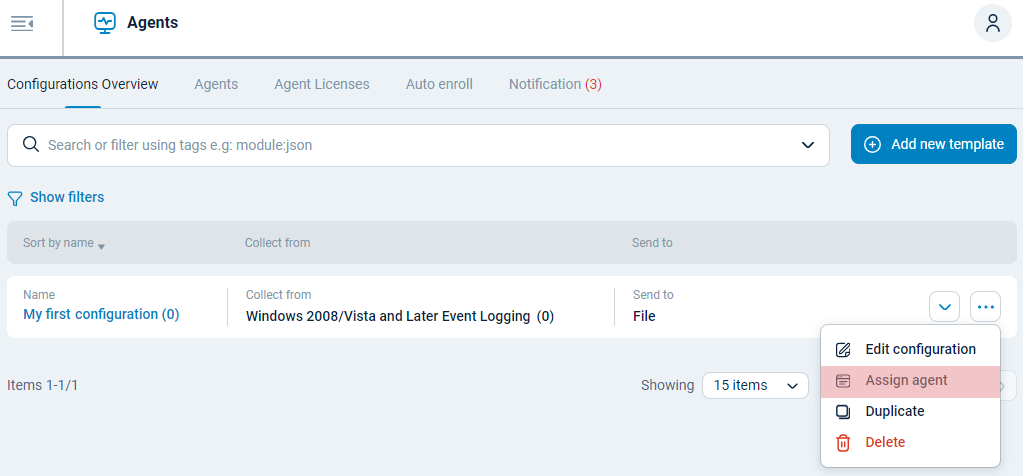
Step 8: Assign your configuration to an agent
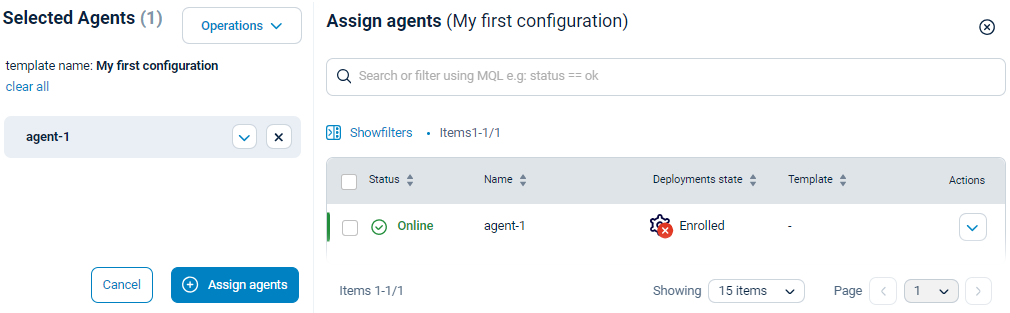
The only thing left is to assign the configuration to an agent so it can start collecting logs. Click the actions menu next to the configuration, then select Assign to agent.
Select the agents you want to assign the configuration to, then click the + Assign configuration button.
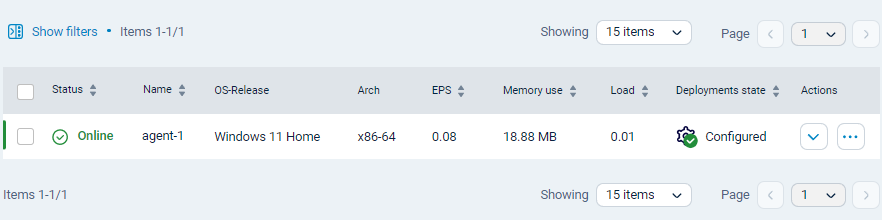
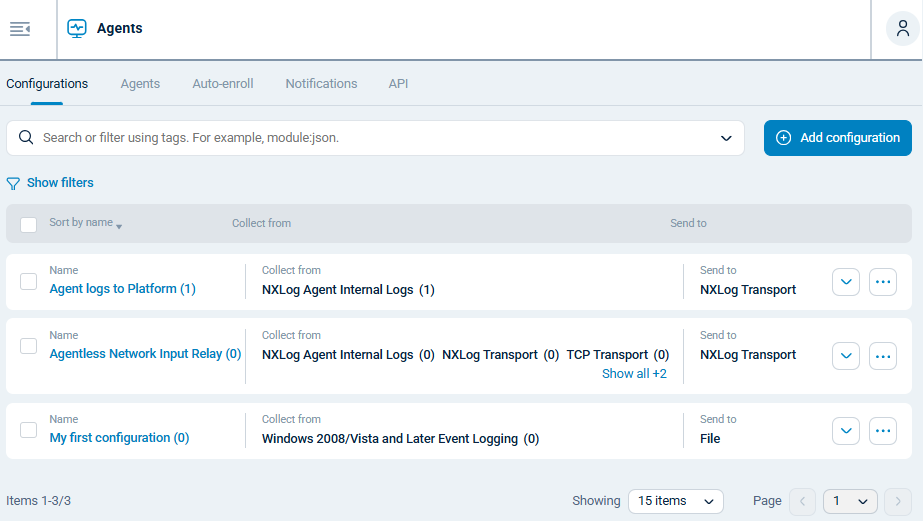
To confirm that the configuration was applied successfully, navigate to Agents and search for your agent. You should now see the status of your agent set to Configured.