
Enroll an agent manually
Adding and enrolling an agent to NXLog Platform is a simple and straightforward process. Follow the steps below to install, configure, and enroll an agent.
NXLog Agent compatibility
NXLog Platform currently supports the following NXLog Agent versions:
-
NXLog Agent 5.10 or later.
-
NXLog Agent 6.2 or later.
|
Consider regularly updating your agents, as each NXLog Agent version provides new features that improve the compatibility with NXLog Platform. For example, NXLog Agent 6.4 and later versions support auto-enrollment to NXLog Platform on installation, greatly simplifying the agent enrollment process. |
Install and enroll an agent
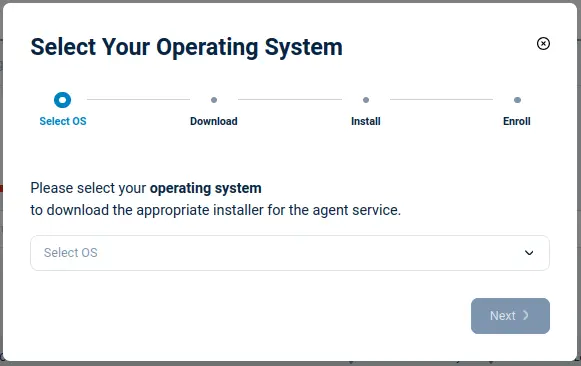
Navigate to Agents from the left navigation menu and click the Add agent button. A wizard will walk you through the steps to download, install, and enroll the agent:
-
Select the operating system where you are installing the agent and click Next to proceed.
-
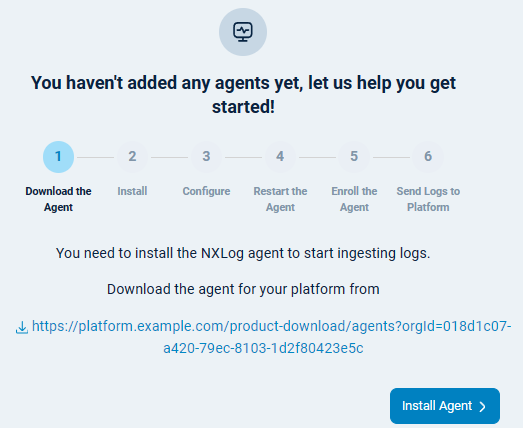
Click Download Installer to go the NXLog Agent download page. You may need to sign in to your NXLog Platform online account. Download the relevant installer and copy the file to the machine where you’ll install NXLog Agent. Click Next to proceed.
-
If you’re installing NXLog Agent version 6.5 or newer on Windows, RHEL, Debian/Ubuntu, or macOS, follow the instructions in the wizard, making sure you specify the correct installer filename.
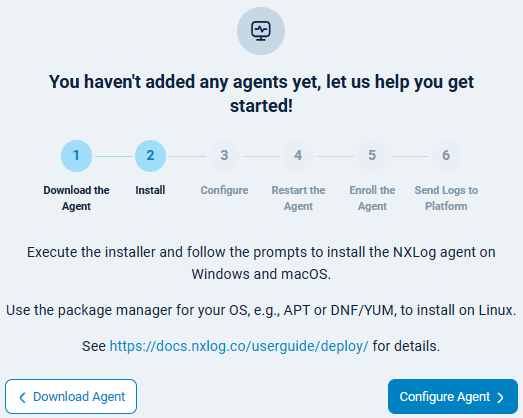
If you’re installing an older NXLog Agent version or on another operating system, follow the installation instructions for your operating system. Once NXLog Agent is installed:
-
Open the
managed.conffile located atC:\Program Files\nxlog\conf\nxlog.don Windows and/opt/nxlog/etc/nxlog.don Linux and macOS with a text editor. -
Replace any existing configuration with the following. Change
example.comto your NXLog Platform domain.managed.confdefine HOST agents.example.com:5515 LogLevel INFO LogFile %MYLOGFILE% <Extension agent_management> Module xm_admin Host %HOST% SocketType SSL AllowUntrusted TRUE RequireCert FALSE <ACL conf> Directory %CONFDIR% AllowRead TRUE AllowWrite TRUE </ACL> <ACL cert> Directory %CERTDIR% AllowRead TRUE AllowWrite TRUE </ACL> </Extension> -
Restart the NXLog Agent service.
-
-
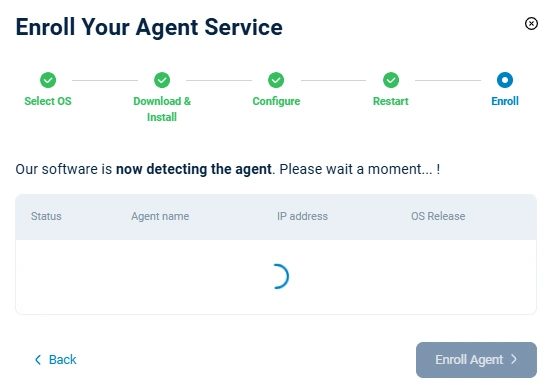
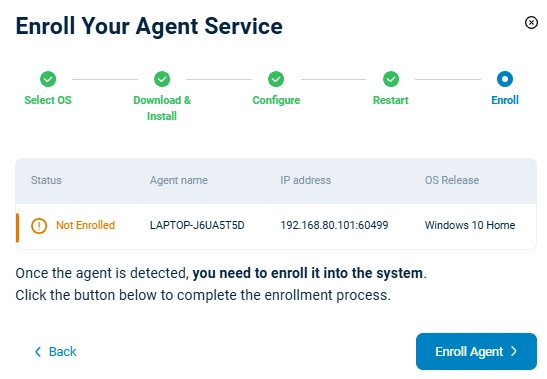
Click Next on the wizard to proceed. At this point, NXLog Platform will try to detect the new agent.
-
Once NXLog Platform detects the connection from the agent, click Enroll agent to complete the process. The agent Status will change to Enrolled.
-
Click Finish to complete the process.
That’s it - you can now monitor and configure your agent from NXLog Platform.
Enroll a connected agent
If the agent is already installed and connected to NXLog Platform, you can enroll it directly through the Actions menu instead of going through the enrollment wizard.
To enroll an agent that is already connected, complete the following steps:
-
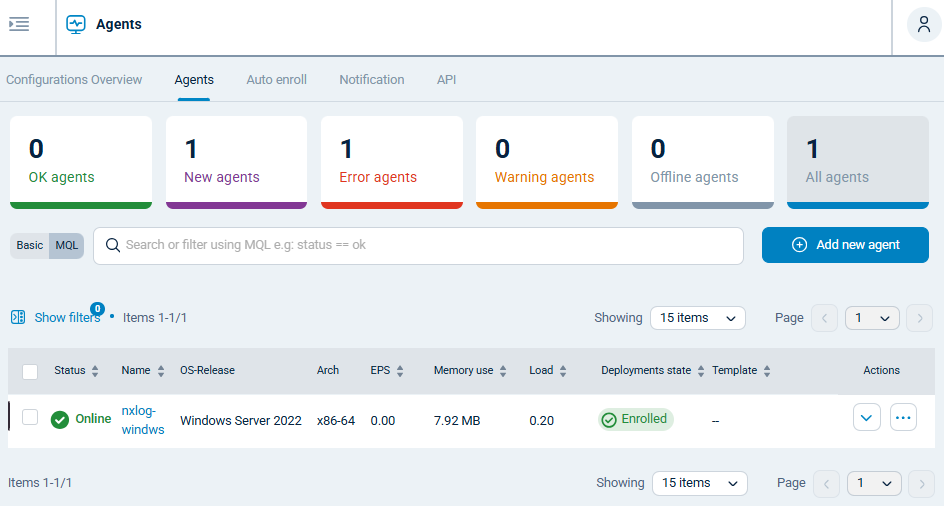
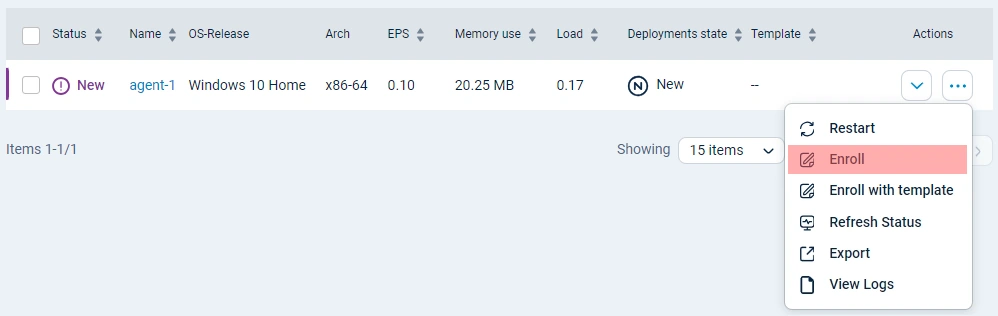
Navigate to the Agents page. You should see your agent listed in the agents table with a New deployment state.
-
Click the Actions menu for your agent.
-
Click Enroll or Enroll with configuration (to enroll and apply a configuration).
Once the agent is enrolled, the Status will change to Online, and the Deployment state will change to Enrolled or Configured (if the agent has a configuration).
Unenroll an agent
If, for some reason, you need to remove the agent, you must unenroll it from NXLog Platform. Unenrolling an agent does not delete or uninstall the agent, but NXLog Platform will stop monitoring it.
To unenroll an agent:
-
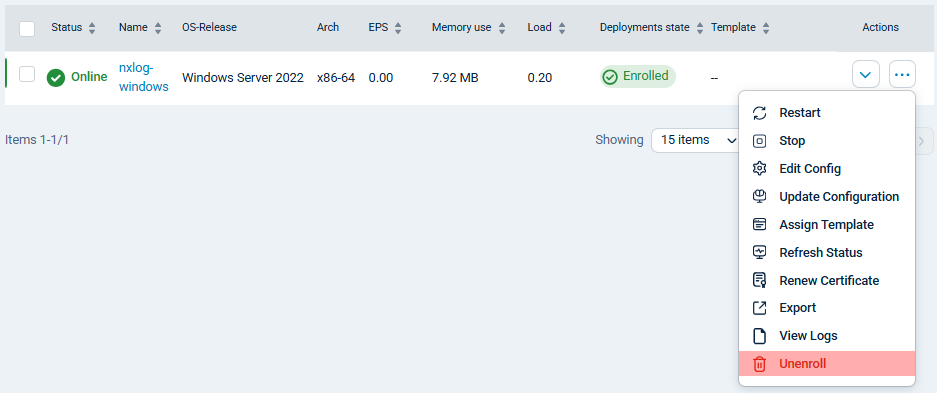
Navigate to the Agents page.
-
Find the agent in the table and click the Actions menu.
-
Choose Unenroll.
|
You should only unenroll agents that you no longer wish to monitor. If you manually uninstall or stop NXLog Agent and unenroll it, it will be removed from the Agents table. However, if you reinstall or start the agent again, it will reconnect to NXLog Platform as a new agent. |