Configure an individual agent
NXLog Platform provides the option to update the configuration of an individual NXLog Agent directly. This might be convenient when you have special requirements for a single NXLog Agent or when you are troubleshooting or testing. Log in to your NXLog Platform account and follow the steps below to configure an individual NXLog Agent.
Configure an individual NXLog Agent from the agents' table
-
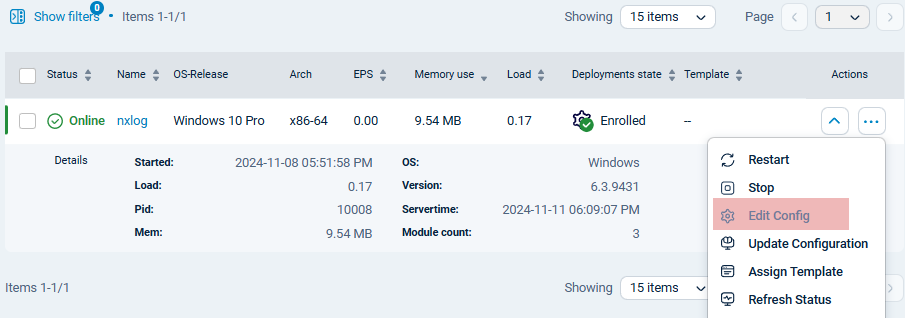
Navigate to Agents and switch to the Agents view.
-
Locate the agent in the agents' table.
-
Click the Actions menu for your agent and choose Edit configuration.

-
In the Edit configuration modal, insert or update your desired configuration.
The NXLog Agent to NXLog Platform connection settings are already in place and visible. You do not need to change those. -
Click Update to save your changes.
-
Restart NXLog Agent for the configuration changes to take effect.
Configure an individual NXLog Agent from the Agent Details page
-
Navigate to Agents and switch to the Agents view.
-
Locate the agent in the agents' table.
-
Click on the name of the agent.
-
Ensure that the Configure view is selected.
-
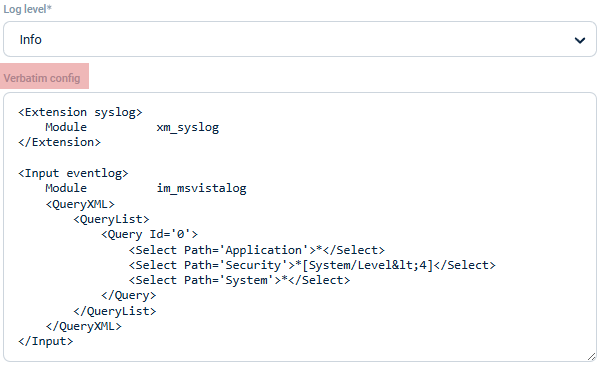
In the Global panel, enter your configuration in the Verbatim config text field.

Click the View config button to see the content of the entire configuration. -
Optionally, leave a comment in the Comment field.
-
Click Save configuration to save your changes.
-
Restart your NXLog Agent so the configuration changes take effect.
The Global panel also has a few other configuration options, such as Agent connection type, Address, and Log level. As your NXLog Agent is already connected to NXLog Platform, you do not need to change them. Also, the Verbatim config text field does not display the part of the NXLog Agent configuration that sets the NXLog Agent’s connection to NXLog Platform.
