Install NXLog Platform using Helm
This method deploys NXLog Platform on-premises into your Kubernetes cluster and is intended for users who already have hands-on experience with Kubernetes administration, including managing namespaces, persistent storage, and ingress configurations. The steps below guide you through installing your instance using Helm package manager for Kubernetes.
Deploy NXLog Platform
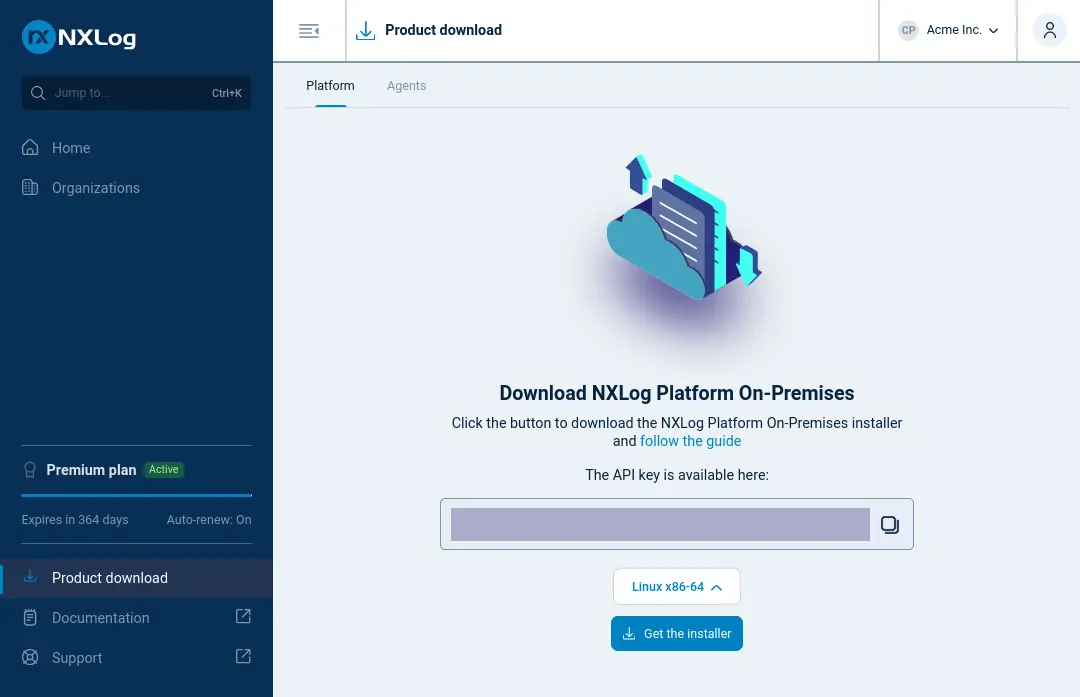
Start by obtaining an NXLog Platform API key:
-
Log in to your NXLog Platform account, or sign up for NXLog Platform if you don’t have an account yet.
-
In the left navigation menu, click Product download.
-
Take note of the API key.
Follow these steps to prepare your environment:
-
Create a Kubernetes namespace:
kubectl create namespace nxp -
Create a secret to store the NXLog container registry authentication details. Replace
<your_api_key>with the API key you obtained earlier.export NXP_API_KEY="<your_api_key>" read NXLOG_ACR ACR_USERNAME ACR_PASSWORD < <(echo $(curl -s -H "Authorization: Bearer ${NXP_API_KEY}" https://platform.nxlog.co/api/v1/registry | jq -r '.registry[]')) kubectl create secret docker-registry nxp-acr-secret \ -n nxp \ --docker-server=$NXLOG_ACR \ --docker-username=$ACR_USERNAME \ --docker-password=$ACR_PASSWORD -
Add the NXLog Platform Helm chart repository:
helm repo add nxp https://charts.cloud.nxlog.com/ helm repo update -
Download and unpack the NXLog Platform Helm chart to access the YAML files for the different deployment profiles:
helm pull nxp/nxp --untar -
Proceed to install the Helm chart using command-line parameters or a YAML file. If you’re using Red Hat OpenShift, refer to Red Hat OpenShift configurations for additional configuration instructions.
Using command-line parameters
This method installs the Helm chart by setting configuration parameters on the command line with the --set flag.
It is a straightforward way to deploy charts and is more suitable for testing.
-
Run the following command to install the Helm chart and deploy NXLog Platform in your cluster, specifying your values accordingly:
helm install nxp nxp/nxp \
     --set global.domain=<nxlog.example.com> \(1)
     --set global.organizationName=<example> \(2)
     --set global.organizationId=<your_organization_id> \(3)
     --set global.secrets.apiKey.value=<your_api_key> \(4)
     --set global.cloudDomain=platform.nxlog.co \
     --set portalBackend.secrets.defaultAdminEmail.value=<admin_email> \(5)
     --set portalBackend.secrets.defaultAdminPassword.value=<admin_password> \
     --set vault.pkiCommonNameCA="NXLog Platform Root CA" \(6)
     --set vault.pkiCATTL="87600h" \
     --set vault.pkiAgentTTL="720h" \
     --set vault.pkiAgentMaxTTL="8760h" \
     --values nxp/profiles/ingress-<ingress_controller>.yaml \(7)
     --values nxp/profiles/size-<deployment_size>.yaml \(8)
     --namespace nxp
1 Domain name for accessing your NXLog Platform instance in the format subdomain.domain.tld. For example,nxlog.example.comif your organization’s domain name isexample.com.2 Name of your NXLog Platform organization. You can check the name of your organization on https://platform.nxlog.co/orgs. 3 Your organization ID. 4 The API key you obtained earlier. 5 Credentials for the built-in NXLog Platform administrator account. 6 The root Certificate Authority (CA) and agent certificate settings. 7 The ingress controller profile to apply. The chart provides ingress-*.yamlfiles for the supported ingress controllers.8 Specify the NXLog Platform deployment size profile. The chart provides size-*.yamlfiles for the available deployment sizes.The command should produce output similar to the following:
NAME: nxp LAST DEPLOYED: Thu Sep 18 18:04:08 2025 NAMESPACE: nxp STATUS: deployed REVISION: 1 TEST SUITE: None -
Verify that the deployment was successful by checking the status of the NXLog Platform pods:
kubectl get pods -n nxp
Using a YAML file
This method installs the Helm chart by setting configuration parameters in a YAML file. It allows you to track configuration changes by using Git and is preferred for production deployments.
-
Create a new text file named
custom-values.yamland add the following YAML configuration, updating it with your values accordingly:custom-values.yaml# custom-values.yaml global: domain: <nxlog.example.com> (1) organizationName: <example> (2) organizationId: <your_organization_id> (3) cloudDomain: platform.nxlog.co secrets: apiKey: value: <your_api_key> (4) secretRef: (5) name: <secret_name> key: <secret_key> portalBackend: secrets: (6) defaultAdminEmail: value: <admin_email> secretRef: name: <secret_name> key: <secret_key> defaultAdminPassword: value: <admin_password> secretRef: name: <secret_name> key: <secret_key> vault: (7) pkiCommonNameCA: "NXLog Platform Root CA" pkiCATTL: "87600h" pkiAgentTTL: "720h" pkiAgentMaxTTL: "8760h"1 Domain name for accessing your NXLog Platform instance in the format subdomain.domain.tld. For example,nxlog.example.comif your organization’s domain name isexample.com.2 Name of your NXLog Platform organization. You can check the name of your organization on https://platform.nxlog.co/orgs. 3 Your organization ID. 4 The API key you obtained earlier. 5 Optionally, specify an existing Kubernetes secret containing the API key. If both valueandsecretRefare specified,secretReftakes precedence.6 Credentials for the built-in NXLog Platform administrator account. 7 The root Certificate Authority (CA) and agent certificate settings. -
Run the following command to install the Helm chart and deploy NXLog Platform on your cluster:
helm install nxp nxp/nxp \
    --values custom-values.yaml \
    --values nxp/profiles/ingress-<ingress_controller>.yaml \(1)
    --values nxp/profiles/size-<deployment_size>.yaml \(2)
    --namespace nxp
1 Specify the ingress controller profile that will be applied. The chart provides ingress-*.yamlfiles for the supported ingress controllers.2 Specify the NXLog Platform deployment size profile. The chart provides size-*.yamlfiles for the available deployment sizes.The command should produce output similar to the following:
NAME: nxp LAST DEPLOYED: Thu Sep 18 18:04:08 2025 NAMESPACE: nxp STATUS: deployed REVISION: 1 TEST SUITE: None -
Verify that the deployment was successful by checking the status of the NXLog Platform pods:
kubectl get pods -n nxp
Red Hat OpenShift configurations
This section describes additional configurations related to Security Context Constraints (SCCs) and Routes that are required when deploying the NXLog Platform Helm chart on Red Hat OpenShift Container Platform.
OpenShift Security Context Constraints
By default, pods are restricted by the restricted-v2 security context constraint, which disallows several actions commonly permitted on vanilla Kubernetes clusters, such as using non-predefined UID ranges.
While the NXLog Platform Helm chart already runs as non-root, the containers define their own user IDs that fall outside the allowed range. As a result, OpenShift will block pod scheduling unless the service accounts are explicitly permitted to use the nonroot-v2 security context constraint. This allows non-root containers to run with arbitrary UIDs while still enforcing restricted-mode policies.
Run the following command to apply the nonroot-v2 security context constraint to all service accounts used by the NXLog Platform Helm chart:
oc adm policy add-scc-to-user nonroot-v2 \
  -n nxp \
  -z acr-creds-updater \
  -z agent-manager-backend \
  -z agent-manager-frontend \
  -z broker \
  -z clickhouse \
  -z external-nxlog \
  -z internal-nxlog \
  -z logging-audit-backend \
  -z logging-audit-logs-management \
  -z logs-management \
  -z portal-backend \
  -z portal-frontend \
  -z postgres \
  -z vault \
  -z vault-agent
OpenShift Routes
OpenShift uses Routes instead of Ingress resources to expose HTTP(S) traffic. The NXLog Platform Helm chart supports OpenShift Routes through the provided OpenShift deployment profile.
Configure the hostnames and termination types in the deployment profile, and specify the flag --values nxp/profiles/openshift-routes.yaml when running helm install or helm upgrade.
# charts/nxp/profiles/openshift-routes.yaml
agentManagerBackend:
  service:
    type: ClusterIP # Exposes TCP port 5515. Options: NodePort, ClusterIP, LoadBalancer
  route:
    platform:
      enabled: true
      annotations: {}
      hostname: "platform.<nxlog.example.com>"
      termination_type: edge
      termination_policy: None
    agents:
      enabled: true
      annotations: {}
      hostname: "agents.<nxlog.example.com>"
      termination_type: edge
      termination_policy: None

agentManagerFrontend:
  route:
    enabled: true
    annotations: {}
    hostname: "agents.<nxlog.example.com>"
    termination_type: edge
    termination_policy: None

portalBackend:
  route:
    enabled: true
    annotations: {}
    hostname: "agents.<nxlog.example.com>"
    termination_type: edge
    termination_policy: None

portalFrontend:
  route:
    enabled: true
    annotations: {}
    hostname: "platform.<nxlog.example.com>"
    termination_type: edge
    termination_policy: None

logsManagement:
  route:
    enabled: true
    annotations: {}
    hostname: "agents.<nxlog.example.com>"
    termination_type: edge
    termination_policy: None

externalNxlog:
  service:
    type: ClusterIP # Exposes TCP port 5514. Options: NodePort, ClusterIP, LoadBalancer
Configure ingress for NXLog Agent ports
You must expose the following raw TCP ports to connect NXLog Agent instances to NXLog Platform:
- TCP 5514
-
Default port for connecting to the NXLog Platform agent relay. This port is only necessary if you intend to ship logs to NXLog Platform.
- TCP 5515
-
NXLog Platform Agent Management. This port is required to allow NXLog Agent instances to be managed by NXLog Platform.
Below, we provide example instructions on how to expose the relevant ports using the supported ingress controllers. However, you should expose the ports in a way that complies with your existing security and ingress controller configurations.
AWS Load Balancer Controller
| You must use a standard (self-managed) EKS cluster for now because there is a bug on EKS Auto Mode clusters that prevents the required URL rewrite annotations from working properly. |
-
Make sure that AWS Load Balancer Controller is configured correctly with IAM roles for service accounts (IRSA).
-
Create a new text file named
ingress-alb.yamland add the YAML configuration below to provision three dedicated load balancers:Load balancer name Type and purpose Ports nxp-external-nxlog-nlbLayer 4 Network Load Balancer for agent relay traffic
5514
nxp-agent-manager-nlbNetwork Load Balancer for NXLog Platform Agent Management traffic
5515
nxp-albApplication Load Balancer for HTTP(S) traffic for the NXLog Platform and NXLog Agent components
80, 443
To use private load balancers that are accessible only within your VPC, use the
internalscheme in the annotationsservice.beta.kubernetes.io/aws-load-balancer-schemeandalb.ingress.kubernetes.io/scheme.ingress-alb.yaml# Ingress profile: use alb ingress controller. global: ingress: enabled: true controller: alb agentManagerBackend: service: type: LoadBalancer annotations: service.beta.kubernetes.io/aws-load-balancer-name: "nxp-agent-manager-nlb" service.beta.kubernetes.io/aws-load-balancer-type: "external" service.beta.kubernetes.io/aws-load-balancer-nlb-target-type: "ip" # Set to "internal" for an internal load balancer service.beta.kubernetes.io/aws-load-balancer-scheme: "internet-facing" ingressPlatform: enabled: true controller: alb ingressClassName: alb pathType: ImplementationSpecific path: /api/v1/minder annotations: alb.ingress.kubernetes.io/group.name: nxp alb.ingress.kubernetes.io/load-balancer-name: nxp-alb # Set to "internal" for an internal load balancer alb.ingress.kubernetes.io/scheme: internet-facing alb.ingress.kubernetes.io/target-type: ip alb.ingress.kubernetes.io/backend-protocol: HTTP alb.ingress.kubernetes.io/listen-ports: '[{"HTTP":80}, {"HTTPS":443}]' alb.ingress.kubernetes.io/ssl-redirect: "443" ingressAgents: enabled: true controller: alb ingressClassName: alb pathType: ImplementationSpecific path: /api annotations: alb.ingress.kubernetes.io/group.name: nxp alb.ingress.kubernetes.io/load-balancer-name: nxp-alb # Set to "internal" for an internal load balancer alb.ingress.kubernetes.io/scheme: internet-facing alb.ingress.kubernetes.io/target-type: ip alb.ingress.kubernetes.io/backend-protocol: HTTP alb.ingress.kubernetes.io/listen-ports: '[{"HTTP":80}, {"HTTPS":443}]' alb.ingress.kubernetes.io/ssl-redirect: "443" agentManagerFrontend: ingress: enabled: true controller: alb ingressClassName: alb pathType: Prefix path: / annotations: alb.ingress.kubernetes.io/group.name: nxp alb.ingress.kubernetes.io/load-balancer-name: nxp-alb # Set to "internal" for an internal load balancer alb.ingress.kubernetes.io/scheme: internet-facing alb.ingress.kubernetes.io/target-type: ip alb.ingress.kubernetes.io/backend-protocol: HTTP alb.ingress.kubernetes.io/listen-ports: '[{"HTTP":80}, {"HTTPS":443}]' alb.ingress.kubernetes.io/ssl-redirect: "443" portalBackend: ingress: enabled: true controller: alb ingressClassName: alb pathType: ImplementationSpecific path: /api/portal/v1/* annotations: alb.ingress.kubernetes.io/group.name: nxp alb.ingress.kubernetes.io/load-balancer-name: nxp-alb # Set to "internal" for an internal load balancer alb.ingress.kubernetes.io/scheme: internet-facing alb.ingress.kubernetes.io/target-type: ip alb.ingress.kubernetes.io/backend-protocol: HTTP alb.ingress.kubernetes.io/listen-ports: '[{"HTTP":80}, {"HTTPS":443}]' alb.ingress.kubernetes.io/ssl-redirect: "443" portalFrontend: ingress: enabled: true controller: alb ingressClassName: alb pathType: Prefix path: / annotations: alb.ingress.kubernetes.io/group.name: nxp alb.ingress.kubernetes.io/load-balancer-name: nxp-alb # Set to "internal" for an internal load balancer alb.ingress.kubernetes.io/scheme: internet-facing alb.ingress.kubernetes.io/target-type: ip alb.ingress.kubernetes.io/backend-protocol: HTTP alb.ingress.kubernetes.io/listen-ports: '[{"HTTP":80}, {"HTTPS":443}]' alb.ingress.kubernetes.io/ssl-redirect: "443" logsManagement: ingress: enabled: true ingressClassName: alb controller: alb pathType: ImplementationSpecific path: /api/portal/v2/storage/* annotations: alb.ingress.kubernetes.io/group.name: nxp alb.ingress.kubernetes.io/load-balancer-name: nxp-alb # Set to "internal" for an internal load balancer alb.ingress.kubernetes.io/scheme: internet-facing alb.ingress.kubernetes.io/target-type: ip alb.ingress.kubernetes.io/backend-protocol: HTTP alb.ingress.kubernetes.io/listen-ports: '[{"HTTP":80}, {"HTTPS":443}]' alb.ingress.kubernetes.io/ssl-redirect: "443" externalNxlog: service: type: LoadBalancer annotations: service.beta.kubernetes.io/aws-load-balancer-name: "nxp-external-nxlog-nlb" service.beta.kubernetes.io/aws-load-balancer-type: "external" service.beta.kubernetes.io/aws-load-balancer-nlb-target-type: "ip" # Set to "internal" for an internal load balancer service.beta.kubernetes.io/aws-load-balancer-scheme: "internet-facing" -
Run the following command to apply the configuration and upgrade your Helm installation:
helm upgrade --install nxp nxp/nxp \ --values custom-values.yaml \ --values ingress-alb.yaml \ --namespace nxp -
Configure DNS records in your corporate DNS server pointing your hostnames to the load balancers provisioned by the previous step:
Hostname Load balancer Ports relay.<nxlog.example.com>nxp-external-nxlog-nlb5514
tcp.agents.<nxlog.example.com>nxp-agent-manager-nlb5515
platform.<nxlog.example.com>nxp-alb80, 443
agents.<nxlog.example.com>nxp-alb80, 443
By default, Agent Management TCP traffic and HTTP(S) traffic are accessible via two different hostnames, tcp.agents.nxlog.example.com and agents.nxlog.example.com, respectively.
To use a single hostname for both, see the following section.
Using a single hostname with a front-facing Network Load Balancer
Provision a dedicated front-facing Network Load Balancer outside of Kubernetes as the single public entry point, routing traffic to the correct internal load balancers based on the port number.
platform.<nxlog.example.com>
       |
       ▼
  front-nlb (public)
  ├── :80   → nxp-alb (internal)
  └── :443  → nxp-alb (internal)

agents.<nxlog.example.com>
       │
       ▼
  front-nlb (public)
  ├── :5515 → nxp-agent-manager-nlb (internal)
  ├── :80   → nxp-alb (internal)
  └── :443  → nxp-alb (internal)

relay.<nxlog.example.com>
       │
       ▼
  front-nlb (public)
  └── :5514 → nxp-external-nxlog-nlb (internal)
This approach allows the controller-managed load balancers to remain internal while exposing only the front-facing Network Load Balancer to the public. Since the front-facing Network Load Balancer is managed entirely outside of Kubernetes, there is no risk of the AWS Load Balancer Controller overwriting its configuration.
Istio
-
Create a new text file named
istio-install.yamland add the following YAML configuration to expose HTTP, HTTPS, and TCP ports 5514/5515 via the Istio operator:istio-install.yaml# istio-install.yaml apiVersion: install.istio.io/v1alpha1 kind: IstioOperator spec: components: ingressGateways: - name: istio-ingressgateway enabled: true k8s: service: ports: - name: status-port port: 15021 targetPort: 15021 - name: http2 port: 80 targetPort: 8080 - name: https port: 443 targetPort: 8443 - name: tcp-5514 port: 5514 targetPort: 5514 protocol: TCP - name: tcp-5515 port: 5515 targetPort: 5515 protocol: TCP -
Run the following command to upgrade your Istio installation:
istioctl upgrade -f istio-install.yaml -
Create a new text file named
istio-gateway.yamland add the following YAML configuration with HTTP to HTTPS redirect, HTTPS termination, and TCP passthrough for agents. Replace instances ofnxlog.example.comwith the domain name for your NXLog Platform instance.istio-gateway.yaml# istio-gateway.yaml apiVersion: networking.istio.io/v1 kind: Gateway metadata: name: istio-ingressgateway namespace: istio-system spec: selector: istio: ingressgateway servers: - port: number: 80 name: http protocol: HTTP hosts: - "*.nxlog.example.com" tls: httpsRedirect: true - port: number: 443 name: https protocol: HTTPS hosts: - "*.nxlog.example.com" tls: mode: SIMPLE credentialName: wildcard-nxlog-example-com - hosts: - "relay.nxlog.example.com" port: name: tcp-5514 number: 5514 protocol: TLS tls: mode: PASSTHROUGH - hosts: - "agents.nxlog.example.com" port: name: tcp-5515 number: 5515 protocol: TLS tls: mode: PASSTHROUGH -
Run the following command to apply the configuration:
kubectl apply -f istio-gateway.yaml
Red Hat OpenShift
Because OpenShift Routes are limited to HTTP/S and TLS passthrough traffic (Layer 7), they cannot expose arbitrary TCP ports.
The exposure method depends on your OpenShift environment:
-
On managed clusters such as ARO or ROSA, you can use the LoadBalancer service type, which automatically provisions external listeners through the cloud provider’s load balancer.
-
On on-premises environments, the NodePort service type exposes the same ports on each worker node and can be combined with your organization’s external load balancer.
These options are configurable in the OpenShift deployment profile provided with the NXLog Platform Helm chart.
For enterprise deployments, traffic is typically routed through an external ADC such as F5 LTM or Citrix NetScaler, which forwards connections to the appropriate backend services inside the cluster.
The NXLog Agent request flow is as follows:
# direct relay traffic to the external-nxlog service
relay.<nxlog.example.com>:5514  ---> <LoadBalancer IP>:5514 ---> nxp-external-nxlog.nxp.svc.cluster.local:5514

# direct agent traffic to the agent-manager-backend-agent service
agents.<nxlog.example.com>:5515 ---> <LoadBalancer IP>:5515 ---> nxp-agent-manager-backend-agent.nxp.svc.cluster.local:5515
Traefik
-
Create a new text file named
values-traefik-tcp.yamland add the following YAML configuration to expose the TCP ports:values-traefik-tcp.yaml# values-traefik-tcp.yaml ports: tcp-5514: port: 5514 expose: default: true exposedPort: 5514 protocol: TCP tcp-5515: port: 5515 expose: default: true exposedPort: 5515 protocol: TCP service: type: LoadBalancer -
Run the following commands to apply the configuration:
# Add Traefik Helm repository helm repo add traefik https://traefik.github.io/charts helm repo update # Install or upgrade Traefik helm upgrade --install traefik traefik/traefik \ -n traefik --create-namespace \ -f values-traefik-tcp.yaml -
Create a new text file named
nxp-agents-tcp.yamland add the following YAML configuration to route entrypoints to the corresponding NXLog Platform services:nxp-agents-tcp.yaml# nxp-agents-tcp.yaml apiVersion: traefik.io/v1alpha1 kind: IngressRouteTCP metadata: name: nxp-relay-5514 namespace: nxp spec: entryPoints: - tcp-5514 routes: - match: "HostSNI(`*`)" services: - name: nxp-external-nxlog port: 5514 --- apiVersion: traefik.io/v1alpha1 kind: IngressRouteTCP metadata: name: nxp-agents-5515 namespace: nxp spec: entryPoints: - tcp-5515 routes: - match: "HostSNI(`*`)" services: - name: nxp-agent-manager-backend-agent port: 5515 -
Run the following command to apply the configuration:
kubectl apply -f nxp-agents-tcp.yaml
Ingress NGINX Controller (deprecated)
|
NXLog no longer provides support or new feature development for the community-maintained Ingress NGINX Controller following the retirement by Kubernetes. Use the instructions below only if you are already using the Ingress NGINX Controller. Existing deployments will continue to function, but will not receive updates. For new deployments, we recommend using one of the supported ingress controllers instead. |
-
Create a new text file named
values-nginx-tcp.yamland add the following YAML configuration to expose the TCP ports and route them to the corresponding NXLog Platform services:values-nginx-tcp.yaml# values-nginx-tcp.yaml tcp: "5514": "nxp/nxp-external-nxlog:5514" "5515": "nxp/nxp-agent-manager-backend-agent:5515" controller: service: type: LoadBalancer -
Run the following commands to apply the configuration:
# Add Ingress NGINX Helm repository
helm repo add ingress-nginx https://kubernetes.github.io/ingress-nginx
helm repo update

# Install or upgrade Ingress NGINX
helm upgrade --install ingress-nginx ingress-nginx/ingress-nginx \
    -n ingress-nginx --create-namespace \
    -f values-nginx-tcp.yaml
Post-installation steps
Once you have installed NXLog Platform, we advise performing the following additional configuration steps immediately to tighten security and initiate important features.
Configure DNS
You need to configure the appropriate DNS records before you can access your NXLog Platform instance. You will likely need to do this on your corporate DNS server.
Create DNS A records for the following domain names and point them all to the IP address of the deployment machine, replacing nxlog.example.com with the actual domain you configured on /etc/nxp.conf while installing NXLog Platform.
-
platform.nxlog.example.com -
agents.nxlog.example.com -
relay.nxlog.example.com
For testing purposes, you can add the following entries to the hosts file on your workstation and on any machine running NXLog Agent.
Replace 192.168.1.123 with the IP address of your NXLog Platform host machine and nxlog.example.com with the domain you configured on /etc/nxp.conf while installing NXLog Platform:
# Your workstation must resolve the names for the services
# hosting the NXLog Platform UI
192.168.1.123 platform.nxlog.example.com agents.nxlog.example.com

# The machines running agents must resolve the names for the services
# responsible for the NXLog Platform log collection and management
192.168.1.123 relay.nxlog.example.com agents.nxlog.example.com
Set up custom TLS certificates
By default, NXLog Platform uses self-signed certificates to serve the web UI and signing agent certificates. We recommend using your own TLS certificates generated by a local or public Certificate Authority (CA) for production environments.
Certificates are typically configured on the Ingress controller or LoadBalancer service.
Your cluster administrator is responsible for managing how users and agents communicate with NXLog Platform.
If you skip this step, the browser will alert you that your connection is not secure when accessing the NXLog Platform web UI.
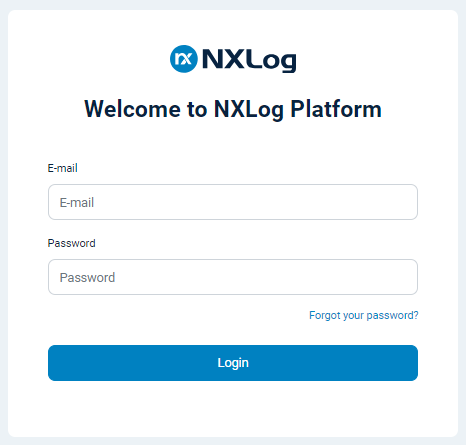
Sign in for the first time
Before you can sign in to NXLog Platform, you need to configure DNS.
After the DNS records are in place, open a web browser and navigate to your NXLog Platform URL, replacing nxlog.example.com with your domain:
https://platform.nxlog.example.com
Sign in to NXLog Platform using the credentials you defined in /etc/nxp.conf while installing NXLog Platform.
If you didn’t change them, use the default credentials for the built-in administrator account:
Username: admin@localhost.local
Password: NXLogPlatform_1
Configure a mail server
NXLog Platform needs to connect to an SMTP server to send emails such as user invites, password reset requests, and system alerts. Without configuring an SMTP server, those features will be unavailable.
Refer to Configure a mail server for step-by-step instructions.
Harden the administrator account
If you haven’t changed the administrator account credentials during installation, we highly recommend changing them after you sign in for the first time. We also recommend enabling two-factor authentication (2FA) for the account.
-
Ensure that you have configured a mail server.
-
Follow the steps to Update personal information to change the administrator email address. We recommend changing the email address to one that you monitor regularly, as NXLog Platform sends important email notifications to the administrator.
After completing the change, use the new email address for future logins.
-
Follow the steps to Change your password for the administrator account.
-
Follow the steps in Activate two-factor authentication to configure 2FA for the administrator account.
Update the NXLog Agent listening port (optional)
If you specified a different agent management port than the default 5515 when setting up the ingress profile, you must follow these additional steps:
-
Open
https://agents.nxlog.example.com/settings/agent-manager, replacingnxlog.example.comwith your domain. -
Update the port of the default enrollment address and click Save.
This ensures that NXLog Platform sends the correct port when enrolling new agents.
-
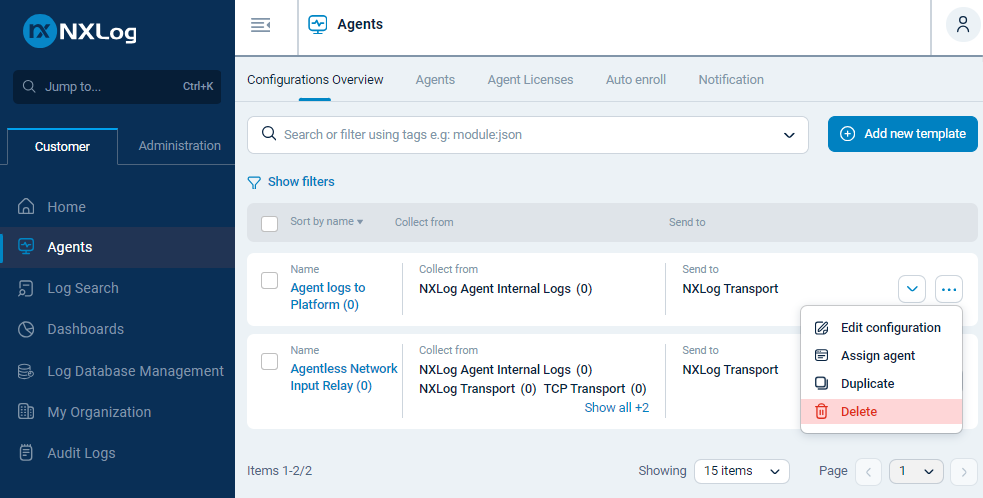
Navigate to Agents > Configurations, and delete all built-in configurations by clicking the Actions menu and choosing Delete.
NXLog Platform automatically recreates the built-in configurations using the updated NXLog Agent listening port.