Logging in
After installing NXLog Manager with the default values and starting it, open a browser and enter the URL corresponding to the version installed:
-
https://localhost:9443for all NXLog Manager versions starting from 5.5 -
http://localhost:9090for all versions prior to 5.5.
The login screen is displayed:

NXLog Manager ships with one built-in administrator account. The User ID is admin and the password is nxlog123. This default password should be changed as soon as possible.
The Menu Bar
After logging in, the dashboard and main menu are displayed.

- HOME
-
Displays the dashboard.
- PATTERNS
-
- CREATE PATTERN
-
Create a new pattern.
- LIST PATTERNS
-
Display a list of all available patterns.
- SEARCH PATTERN
-
Display a search page for patterns.
- CREATE GROUP
-
Create a new pattern group.
- LIST GROUPS
-
Display a list of all available pattern groups.
- IMPORT PATTERN
-
Open the dialog to import a pattern database file.
- CREATE FIELD
-
Create a new field.
- LIST FIELDS
-
Display a list of all available fields.
- CORRELATION
-
Open the correlation rules and rulesets management page.
- LIST RULESETS
-
List available rulesets.
- IMPORT RULESET
-
Import a ruleset file. See Exporting and Importing Correlation Rules.
- AGENTS
-
Display the agents management page.
- ADMIN
-
- USERS
-
Load the user management interface.
- ROLES
-
Load the roles management interface.
- CERTIFICATES
-
Display a list of certificates available in the built-in PKI.
- SETTINGS
-
Display system-wide settings and personal preferences page.
- LOGOUT
-
Log out of the NXLog Manager web application and terminate your session.
|
Menu items are shown or hidden based on the current user’s configured roles. See Roles for more information about access control in NXLog Manager. |
The successive chapters are organized to cover each of these components which can be accessed from the menu.
Dashboards
Dashboards are convenient for displaying service information on the HOME page of the NXLog Manager user interface.
To learn the basic principles of dashboards, see the Dashboard basics section. To read about configuring dashboards, go to the Managing dashboards section.
Dashboard basics
Dashboards can be either public or private. Public dashboards are available for use by all authorized NXLog Manager users. Private dashboards can only be used by their creators. Each dashboard has its own creator. Only the creator can delete the dashboard from the system. Other users can only remove it from their personal HOME pages.
Each dashboard is capable of containing one or more items. Each item displays specific information; for example, agent or certificate summaries are items.
Dashboard items are role-dependent. This leads to the following considerations:
-
Only users with matching roles are authorized to use items. For instance, besides administrator roles, only a user with the ROLE_AGENT role can operate the agent-related items
-
Users without any assigned roles cannot use dashboards
Managing dashboards
On the first login, the HOME page does not contain any dashboards.

Creating and adding dashboards
-
To create a new dashboard, at the bottom of the page click Add Dashboard.
-
On the Add Dashboard dialog, type the dashboard name into the Name field and specify the visibility using the Visibility dropdown list.
The dashboard name should contain at least three characters.

-
To add the existing dashboard to the HOME page, at the bottom of the page click Add Dashboard.
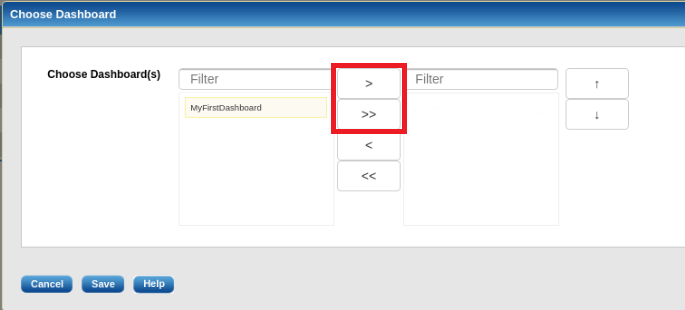
The Choose Dashboard dialog will open.
-
To select the dashboard on the left, then click > at the center of the dialog to move it to the right side.
To select all available dashboards, >> should be clicked.
-
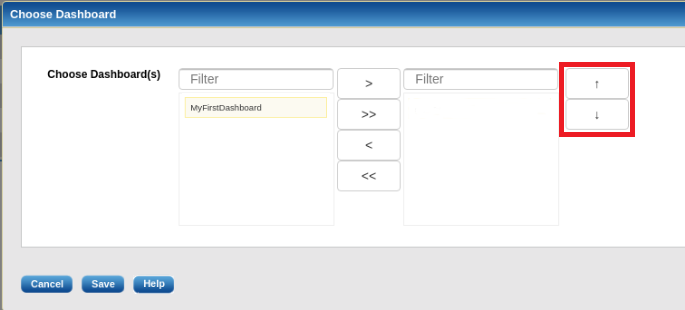
To arrange the dashboard tabs on the HOME page, on the rights side, select the name of the dashboard, then click the up and down arrows to change its position relatively to the other dashboards.
Adding items to a dashboard
-
After creating the dashboard, click Add Item.
Based on the user’s role, some dashboard items may be unavailable. For more information, see the Dashboard basics section.
-
On the Add Item dialog, type in the title name, specify the item type using the Select Item dropdown list, then select the color of the item frame using the Color field.
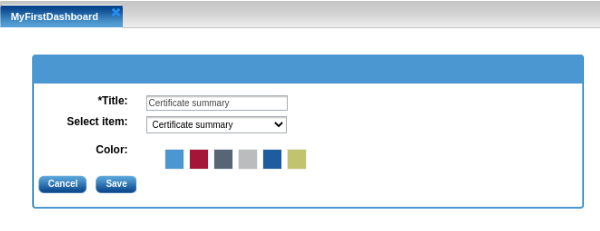
Depending on the user’s role, the following items can be added:
- Certificate summary
-
Summary about certificates, grouped by the following categories:
-
Expired
-
To be expired in the next 10 days
-
Revoked
-
Valid
See the Certificates section for more information.
-
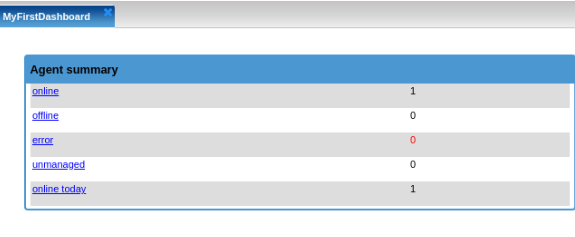
- Agent summary
-
Summary about log agent statuses, grouped by the following categories:
-
Online
-
Offline
-
Error
-
Unmanaged
See the Agents section for more information about agent statuses.
-
- Jobs summary
-
Information about scheduled jobs.
After adding, items are available for use on a dashboard.
Manipulating dashboards and items
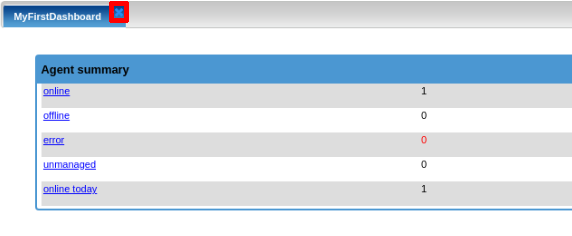
When necessary, a dashboard can be deleted. To do it, click ✕ on the dashboard tab.
Dashboard items can be manipulated using the header bar.
The header bar can be clicked to drag and move the dashboard item around.

The following items are positioned on item the header bar, from left to right:
- Up arrow (▲)
-
Click to maximize the dashboard item.
- Edit
-
Click to edit the dashboard item.
- ✕
-
Click to remove the dashboard item.
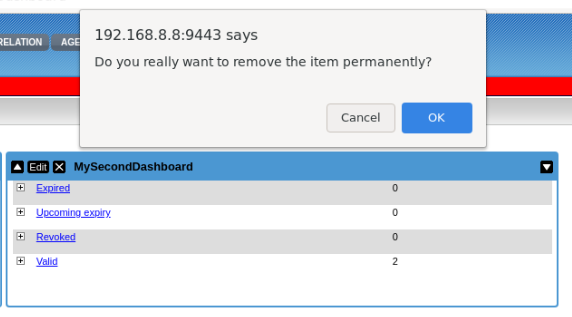
- Title
-
The title provided in the last edit of the dashboard item.
- Down arrow (▼)
-
Click the down arrow in the top right corner to minimize the dashboard item.
