Elastic Cloud
Elastic Cloud is a Software as a Service (SaaS) offering managed enterprise search, data visualization, and security. This includes Elastic SIEM, a solution for analyzing data in your hosted Elasticsearch instance to detect and respond to threats in real time. NXLog can integrate with Elastic Cloud by sending logs over HTTPS and provides several benefits over using Elastic Beats as a data shipper such as:
-
A single NXLog agent installation includes full functionality to collect, process, and forward any type of logs. It can be configured as an end-to-end solution, collecting and sending logs directly to Elastic Cloud, or to act as a relay, receiving logs from different sources and forwarding them to Elastic Cloud.
-
NXLog offers an extensive list of input modules that can collect logs from sources not supported by Elastic Beats. Some of which are the im_etw module, which can collect logs from ETW-only channels such as the Analytical and Debug channels, xm_aixaudit for IBM AIX platforms, and the im_maces and im_maculs modules for collecting Apple Endpoint Security events and ULS logs on macOS.
-
An equally extensive list of extension modules is available for parsing and transforming logs in different formats. Additionally, it includes support for processing logs with external scripts with support for Go, Java, Perl, Python, and Ruby.
-
And last but not least, NXLog is a mature solution that is robust and fit for production environments. All components are developed, maintained, and supported by NXLog, giving you peace of mind that support is available in case you need it.
Sending logs to Elastic Cloud
Logs can be sent to Elastic Cloud using the Elasticsearch REST API. For NXLog to be able to connect to the API, it requires an API key, the Elasticsearch endpoint, and the Elastic Cloud CA certificate. Follow the instructions below to create an API key and retrieve the required information for your instance.
Creating an API key
-
Log in to your Elastic Cloud instance.
-
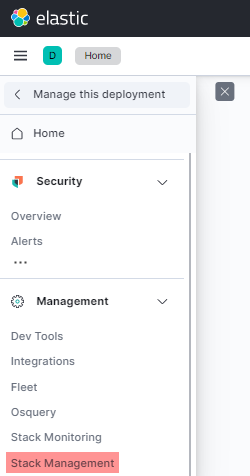
From the main menu, navigate to Management > Stack Management.
-
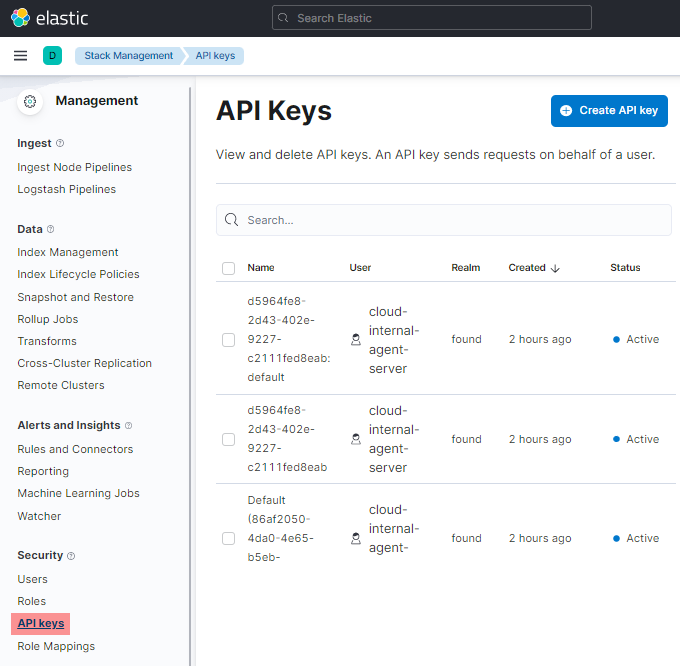
From the management menu, under Security click API keys.
-
Click the Create API key button in the top right.
-
Enter a Name for the new key and click the Create API key button.
-
The new API key will be displayed. You will need the Base64 value for the NXLog configuration.

Make sure to save the key in a safe place because you will not be able to retrieve it once you navigate away from this screen.
Retrieving your API endpoint
-
Log in to your Elastic Cloud instance.
-
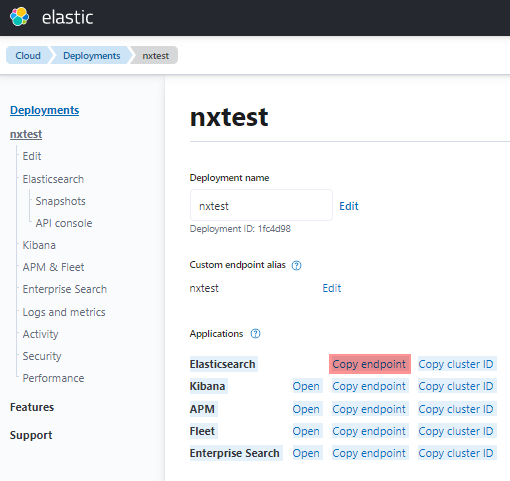
Click on the name of the relevant deployment to view the deployment information.
-
Under Applications, click on Copy endpoint next to Elasticsearch.
Exporting the Elastic Cloud CA certificate
- Exporting the CA certificate using OpenSSL
-
-
Execute the following command:
$ openssl s_client -showcerts -connect <your_instance_url> < /dev/zero
Replace
<your_instance_url>with the endpoint URL retrieved above, including the port. -
The information returned will contain the complete certificate chain. Copy the last certificate shown, including the
-----BEGIN CERTIFICATE-----and-----END CERTIFICATE-----lines, to a text file. -
Save the file to a directory accessible by NXLog.
-
- Exporting the CA certificate from Chrome on Windows
-
-
Open Chrome and log in to your Elastic Cloud instance.
-
In the browser address bar, click on the padlock icon next to the URL.
-
Click Certificate.
-
On the Certification Path tab, select the topmost certificate and click the View Certificate button.
-
From the new dialog go to the Details tab and click the Copy to File… button.
-
Click Next in the export wizard.
-
Select the Base-64 encoded X.509 (.CER) option and click Next.
-
Select the directory where to save the certificate and click Next.
-
Review the details and click Finish to complete the export.
-
The procedure to export certificates differs according to the browser and operating system. Refer to your browser documentation for the relevant steps.
Configuring NXLog to send logs to Elastic Cloud
NXLog Enterprise Edition provides the om_elasticsearch output module that supports sending logs in bulk to Elasticsearch via the REST API. See the configuration example below for how to configure NXLog to forward logs to a managed Elasticsearch instance.
This example demonstrates the output instance for data to be forwarded to Elasticsearch. For in-depth information on how to output log data that complies with ECS, see our guide on the Elastic Common Schema (ECS).
In this configuration, the Elasticsearch endpoint and API key are defined as
constants. Replace the values of ES_URL and
API_KEY with the correct values for your Elastic Cloud instance. See
Creating an API key
and Retrieving your API endpoint.
Since the connection to the REST API uses HTTPS, the HTTPSCAFile directive is used to specify the path to the certificate authority certificate that will be used to verify the identity of the remote server. See Exporting the Elastic Cloud CA certificate.
define ES_URL      https://<your_elasticsearch_endpoint>
define API_KEY     <your_api_key>

<Output elasticsearch>
    Module         om_elasticsearch
    URL            %ES_URL%/_bulk
    AddHeader      Authorization: ApiKey %API_KEY%
    HTTPSCAFile    /path/to/elastic-cloud-ca.pem
</Output>
Verifying data in Elastic Cloud
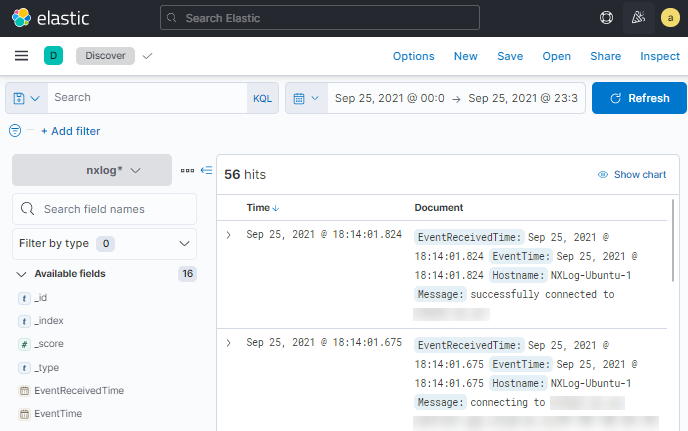
One way to verify reception of log data in Elastic Cloud is from the Kibana app. Log in to your Elastic Cloud instance and from the main menu, navigate to Analytics > Discover.
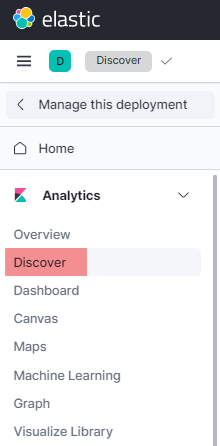
Select the relevant index pattern to display the data. If this is your first time
viewing the data and you have not created an index pattern for it yet, you
will need to create one. The screenshot below shows log records for index
pattern nxlog*.
