Send logs to Graylog
Graylog is a centralized log management solution providing log analysis, real-time searching, data visualization, and alerting. Two editions are available; Graylog open source includes the core Graylog SIEM and is free to use. Graylog enterprise requires a license and offers additional log analytics and anomaly detection for a complete security platform.
NXLog can forward logs to Graylog over TCP with TLS or UDP. It also has a specialized Graylog Extended Log Format (GELF) module for parsing and formatting GELF logs. You can collect logs with NXLog from diverse log sources, including Windows, Linux, and macOS, and send them directly to the Graylog server. Alternatively, you can use NXLog as a relay, receiving logs from different sources over the network and forwarding them to Graylog from a single instance or an NXLog cluster. NXLog’s advanced log collection, processing, and forwarding capabilities make it the ideal alternative to the Graylog Forwarder.
Configure Graylog to receive logs
These steps assume that you have already installed the Graylog server application. See Installing Graylog in the Graylog documentation for installation and initial configuration instructions.
Graylog accepts logs via message inputs and requires you to configure separate inputs for each protocol and log format combination. For example, a message input can receive GELF logs over TCP or syslog over UDP. The instructions below will guide you through creating and configuring a Graylog input.
-
Open the Graylog web interface and navigate to System > Inputs.
-
Choose an input type from the Select input dropdown and click Launch new input. The screenshot below shows
GELF TCPselected.
-
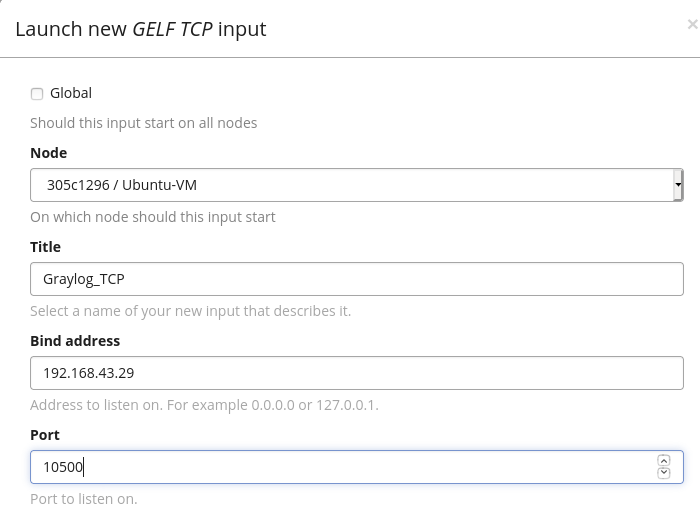
Enter the input parameters in the Launch new input dialog. For example, to create a new GELF TCP input:
-
Select the Graylog Node where this input should start, or enable the Global option to start it on all nodes.
-
Enter a friendly name to identify the input in the Title field.
-
Specify the IP address the input will listen for connections in the Bind address field.
-
Specify the port number the input will listen on in the Port field.
-
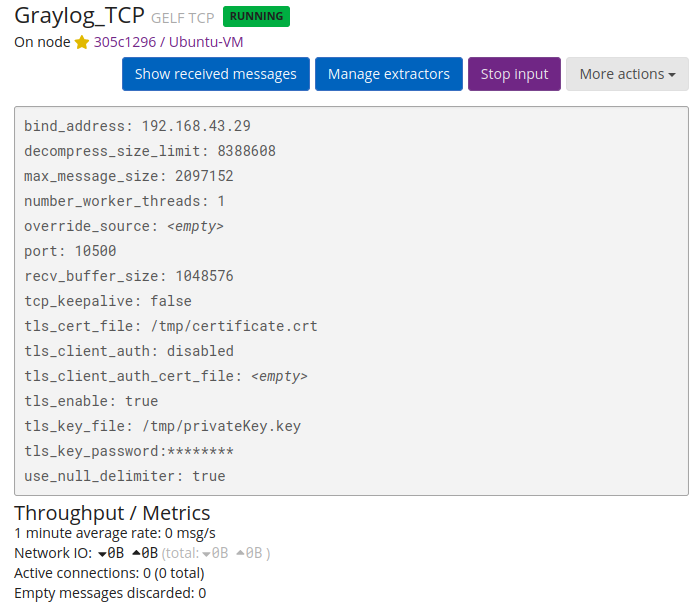
Optionally, enable TLS and configure the required settings. See Enable Graylog input TLS below.
-
-
Click Save, and you will see the new input on the Inputs page shortly after.
Enable Graylog input TLS
Certain Graylog input types, such as TCP and HTTP, support data transfer with TLS. To configure Graylog and NXLog with TLS, you need the following:
-
A Certificate Authority (CA) certificate
-
A Graylog server certificate and private key
-
An NXLog client certificate and private key
See OpenSSL certificate creation for instructions to generate self-signed certificates.
To configure your Graylog input with TLS:
-
Open the Graylog web interface and navigate to System > Inputs.
-
Select More actions > Edit input next to the relevant input.
-
Enter the path to the Graylog server certificate in the TLS cert file field.
-
Enter the path to the Graylog server private key in the TLS private key file field.
-
Check the Enable TLS option.
-
If your private key is password-protected, enter the password in the TLS key password field.
-
Select required for TLS client authentication.
-
Enter the path to the CA, or NXLog client certificate in the TLS Client Auth Trusted Certs field.
The graylog-serverservice user,graylogby default, must be able to access the specified certificates.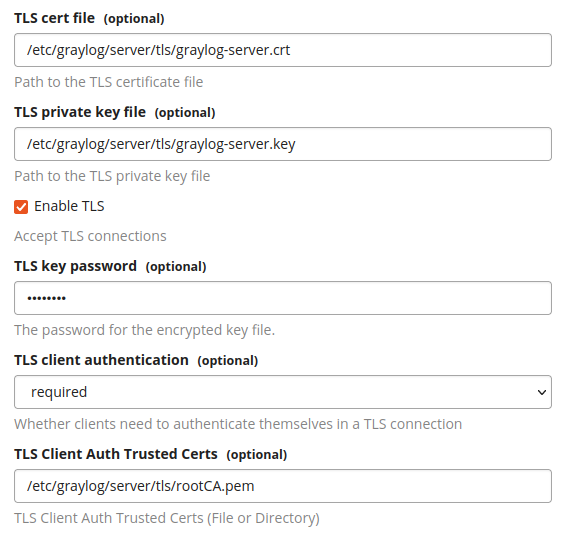
Configure NXLog to send logs to Graylog
The following NXLog configuration examples demonstrate how to send logs to Graylog in GELF over UDP and TCP with TLS.
This configuration uses the im_etw input module to collect Microsoft Windows DNS client logs via ETW. It then forwards the logs to Graylog using the om_udp output module. The OutputType directive specifies the GELF_UDP output writer function provided by the xm_gelf module.
The Graylog server must have a GELF_UDP input configured and running to accept the logs from NXLog.
See Configure Graylog to receive logs above for more information.
<Extension gelf>
    Module        xm_gelf
</Extension>

<Input dns_client_logs>
    Module        im_etw
    Provider      Microsoft-Windows-DNS-Client
</Input>

<Output graylog_udp>
    Module        om_udp
    Host          192.168.43.29:12201
    OutputType    GELF_UDP
</Output>This configuration uses the im_systemd input module to collect Linux systemd logs. It then forwards the logs to Graylog securely using the om_ssl output module. The OutputType directive specifies the GELF_TCP output writer function provided by the xm_gelf module.
The Graylog server must have a GELF_TCP input configured with TLS and running to accept the logs from NXLog.
See Configure Graylog to receive logs above for more information.
<Extension gelf>
    Module         xm_gelf
</Extension>

<Input systemd_logs>
    Module         im_systemd
</Input>

<Output graylog_ssl>
    Module         om_ssl
    Host           192.168.43.29:10500
    OutputType     GELF_TCP

    CertFile       /opt/nxlog/cert/nxlog.crt (1)
    CertKeyFile    /opt/nxlog/cert/nxlog.key (2)
    KeyPass        secret (3)
    CAFile         /opt/nxlog/cert/rootCA.pem (4)
</Output>| 1 | The CertFile directive specifies the path to the NXLog client certificate. |
| 2 | The CertKeyFile directive specifies the path to the NXLog private key. |
| 3 | The KeyPass directive specifies the password for password-protected private keys. |
| 4 | The CAFile directive specifies the path to the Certificate Authority (CA) certificate that will be used to verify the Graylog server certificate. |
Manage NXLog from a Graylog Sidecar
Graylog Sidecar is a lightweight configuration management system that enables you to manage multiple NXLog instances from the Graylog web interface.
To manage NXLog from a Sidecar, you must first configure a collector from the Graylog web interface:
-
Navigate to System > Sidecars and click the Configuration button.
-
Click the Edit button next to the type of NXLog collector you would like to configure, i.e., Linux or Windows.
-
Provide the collector settings and click the Update button. The table below contains the settings for default NXLog Enterprise Edition installations on Windows and Linux.
Table 1. Graylog Log Collector settings Parameter name Microsoft Windows Linux Executable Path
C:\Program Files\nxlog\nxlog.exe/opt/nxlog/bin/nxlogExecute Parameters
-c "%s"-f -q -c %sParameters for Configuration Validation
-v -f -c "%s"-v -c %sThe default settings populated by Graylog apply to NXLog Community Edition and must be updated as shown in the table above for NXLog Enterprise Edition.
Next, create the collector configuration:
-
While on the Log Collector page, click the Configuration button.
-
Click the Create Configuration in the Configurations section.
-
Specify a name for the configuration, select the previously configured collector from the Collector dropdown, and enter the NXLog configuration. The configuration you specify here will override the collector’s default configuration. See the configuration example below.
-
Click Create to create the configuration.
You can now install and configure Graylog Sidecar:
-
Navigate to System > Sidecars and click the Create or reuse a token for the <graylog-sidecar> user link under Sidecars Overview.
-
Enter a Token Name and click Create Token. Take note of the new token; you will need it in the following steps.
-
Install Graylog Sidecar on each NXLog machine. See the Graylog Sidecar documentation for installation instructions and use the token from the previous step when directed to update the
server_api_tokenparameter in thesidecar.ymlconfiguration file. See Sidecar Configuration in the Graylog documentation for more configuration options. -
Follow the collector installation instructions in the Graylog documentation to install and disable NXLog.
Finally, bind the sidecar to an NXLog configuration from the Graylog web interface:
-
Navigate to System > Sidecars.
-
Click the Manage sidecar button next to the relevant sidecar.
-
Select the collector you want to associate with this sidecar and click Configuration.
-
Select the configuration to assign to the collector, review the Configuration summary and click Confirm to apply the settings.
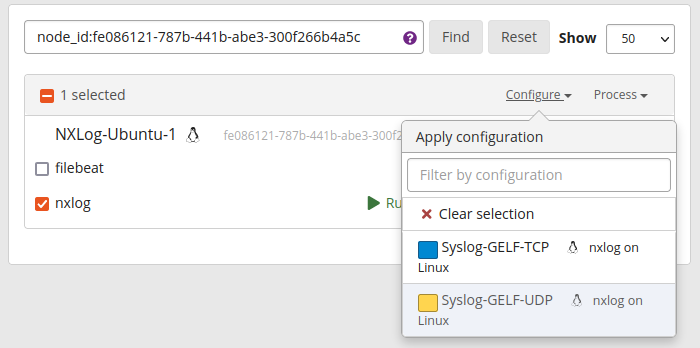
This configuration uses the im_file input module to collect Linux system logs. It then forwards the logs to Graylog using the om_udp output module. The OutputType directive specifies the GELF_UDP output writer function provided by the xm_gelf module.
The Graylog Sidecar must be associated with a GELF_UDP input to accept the logs from NXLog.
See the Sidecar configuration instructions above for more information.
Panic Soft

define INSTALLDIR /opt/nxlog
define CERTDIR %INSTALLDIR%/cert
define CONFDIR %INSTALLDIR%/etc/nxlog.d
define LOGDIR %INSTALLDIR%/var/log/nxlog
define MYLOGFILE %LOGDIR%/nxlog.log

LogLevel    INFO
LogFile     %MYLOGFILE%

<Extension syslog>
    Module        xm_syslog
</Extension>

<Extension gelf>
    Module        xm_gelf
</Extension>

<Input file>
    Module        im_file
    File          '/var/log/syslog'
    <Exec>
        parse_syslog(); (1)

        # These fields are needed for Graylog (2)
        $gl2_source_collector = '${sidecar.nodeId}';
        $collector_node_id = '${sidecar.nodeName}';
    </Exec>
</Input>

<Output graylog_udp>
    Module        om_udp
    Host          192.168.43.29:12201 (3)
    OutputType    GELF_UDP
</Output>

<Route 1>
    Path          file => graylog_udp
</Route>| 1 | Parses log records into structured data using the parse_syslog() procedure of the xm_syslog module. |
| 2 | Adds two fields required by Graylog to associate log records with the sidecar. The value for both fields is a runtime variable that will be replaced with an actual sidecar ID and name. See Using configuration variables in the Graylog documentation for more information. |
| 3 | Forwards logs to a Graylog input listening on this IP and port. |
Verifying data with Graylog search
You can verify the reception of logs from the Graylog web interface. Navigate to System > Inputs and click the Show received messages button next to the relevant input.
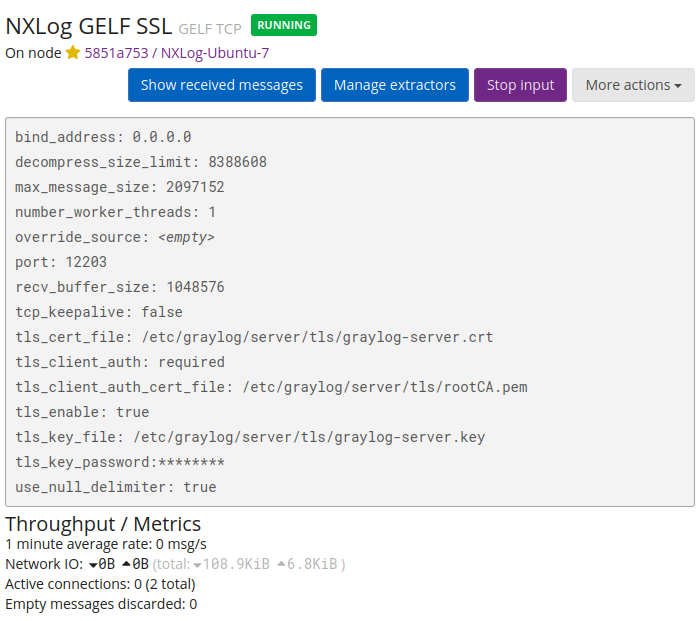
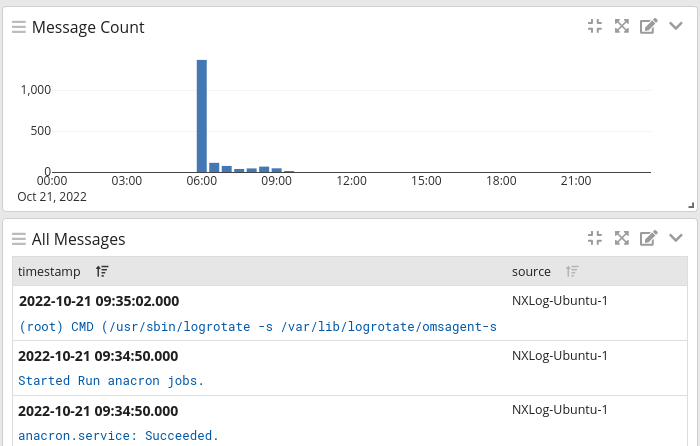
You will be taken to the Search page with a filter for logs received by the chosen input.
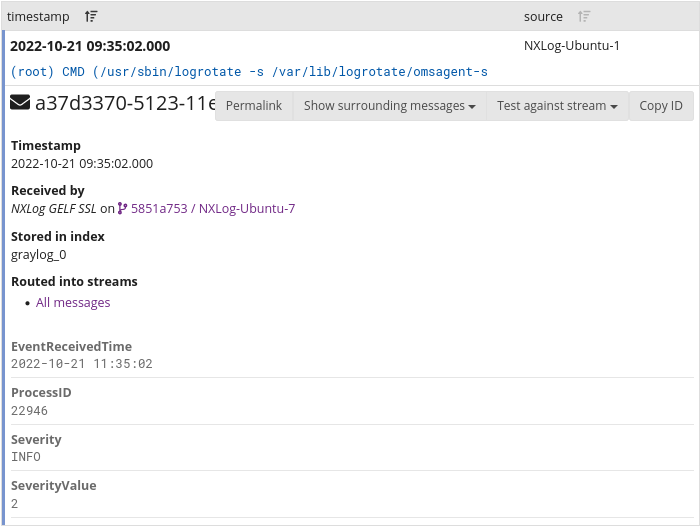
Click on a message to view the log details.
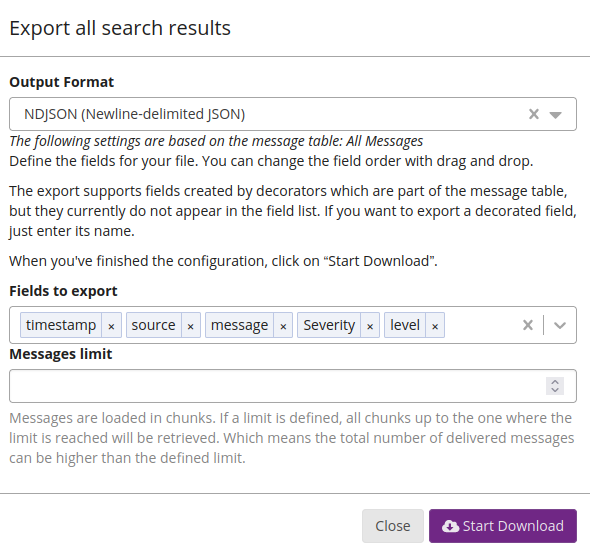
You can export logs to CSV, JSON, NDJSON (newline-delimited JSON), or plain text by expanding the actions dropdown and selecting Export.
Choose the export format and fields, enter an optional message limit, and click Start Download.
