
Users, roles, and access control
NXLog Manager’s user and role management system allows administrators to grant access to functions and resources in a flexible and customizable framework.
Users
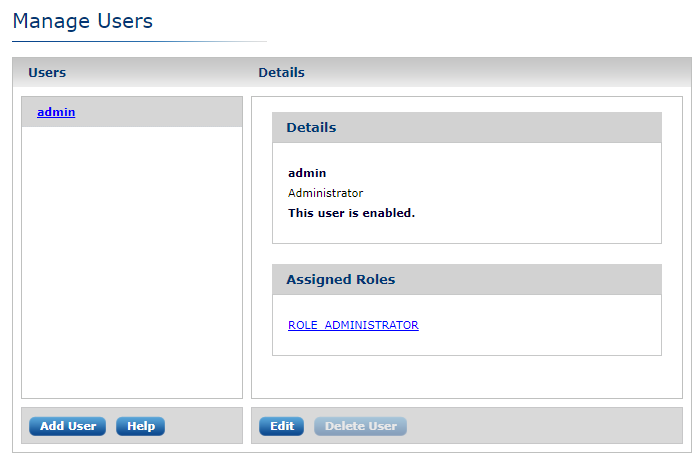
To access user management, from the main menu go to ADMIN, then click USERS. The Manage Users page is displayed.
The default installation creates an admin user.
To add a user, click Add User at the bottom left of the page, as shown below.
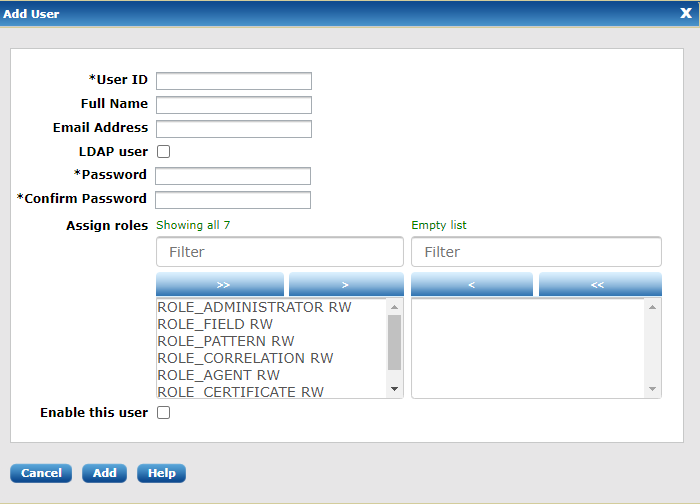
The Add User dialog appears. Enter the new user’s details and credentials. You can also enable the user, assign roles to the user, or toggle the user’s LDAP status (see also LDAP and LDAPS below).
| These settings can be edited after adding the user. |
Click Add. The new user appears in the Users list on the Manage Users page.
| If the user will manage certificates, it is recommended that either ROLE_ADMINISTRATOR or ROLE_CERTIFICATE be assigned to the user immediately. This ensures the new user will receive the encryption key needed to encrypt and decrypt certificate private keys (certificates encryption), if this encryption is enabled (encryption setting). |
| If ROLE_ADMINISTRATOR or ROLE_CERTIFICATE is assigned, the application requires the user’s password to generate the corresponding certificate’s encryption key. This is not required for LDAP users. |
To change the user’s information and role assignments, select the user from the Users list and click Edit. The User Edit dialog appears.
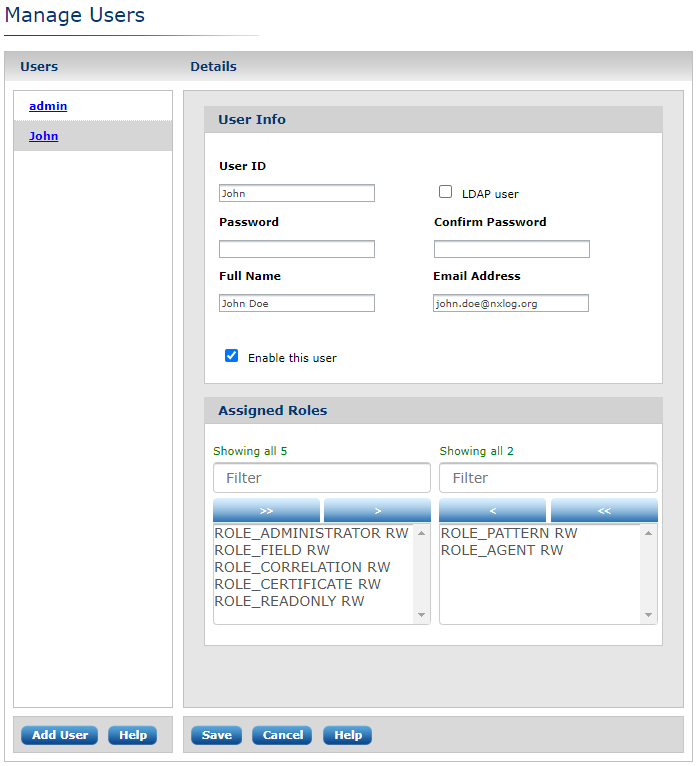
Edit the user information and assigned roles, then click Save.
| By default, all roles have read-write permissions. To restrict certain roles to read-only, click the selected role name. Notice the marker after the role name toggle between RW (read/write access) and RO (read-only access). |
Roles
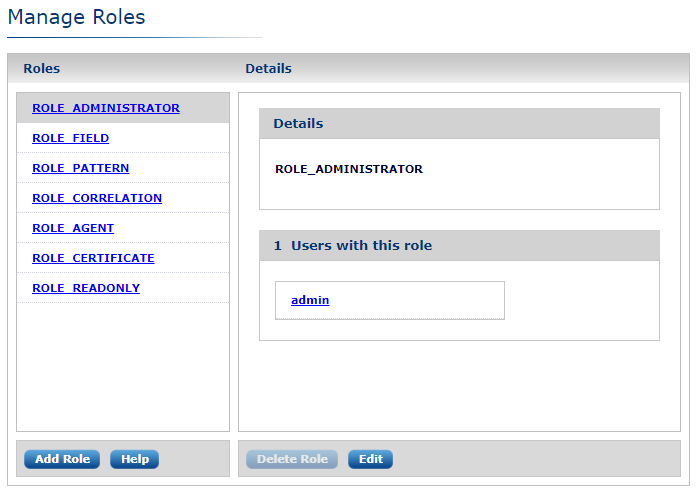
To access role management, from the main menu go to ADMIN, then click ROLES. The Manage Roles page is displayed.
The default installation creates a set of built-in (read-only) roles. They are listed in the Roles pane on the left of the Manage Roles page.
Built-in User Roles
Built-in roles provide a solid basis for most user management scenarios. Each role grants the user access to the functionality described. Built-in roles may not be modified or deleted.
- ROLE_ADMINISTRATOR
-
The user can access and execute all administrative functions.
- ROLE_FIELD
-
The user can access and execute all field administration functions.
- ROLE_PATTERN
-
The user can access and execute all PATTERNS functions.
- ROLE_CORRELATION
-
The user can access and execute all CORRELATION rule functions.
- ROLE_AGENT
-
The user can access and execute all AGENTS functions.
- ROLE_CERTIFICATE
-
The user can access and execute all CERTIFICATES functions.
- ROLE_READONLY
-
This is a special role that denies any modification to the system by the user.
Additional roles for more sophisticated user management scenarios are easily created. Click Add Role at the bottom left of the Manage Roles page. The Add Role dialog appears.
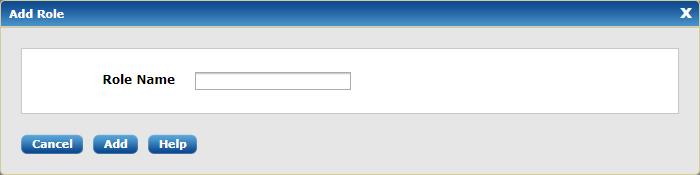
Enter the new role’s name, then click Submit. The new role’s name appears in the list on the Manage Roles page.
LDAP and LDAPS
LDAP and LDAPS (LDAP over SSL) are supported.
LDAP Configuration
To use LDAP, update the jetty environment configuration found in /opt/nxlog-manager/conf/jetty-env.xml and then restart nxlog-manager.
-
Init style services:
service nxlog-manager restart -
Systemd style services:
systemctl restart nxlog-manager -
Systemd on OSX:
launchctl restart nxlog-manager
Review the file to locate these default LDAP attribute settings.
<Set name="ldapEnabled">false</Set>
<Set name="ldapServerURL">ldap://hostname.nxlog.org/dc=nxlog,dc=org</Set>
<Set name="ldapUserSearchBase">ou=nxlogAccounts</Set>
<Set name="ldapUserSearchFilter">(uid={0})</Set>
<Set name="ldapUserDn"></Set>
<Set name="ldapPassword"></Set>
Edit the values to match those in your environment.
Below is an example configuration from a working Active Directory setup.
<Set name="ldapEnabled">true</Set>
<Set name="ldapServerURL">ldap://192.168.1.10/dc=nxlog,dc=org</Set>
<Set name="ldapUserSearchBase">cn=users</Set>
<Set name="ldapUserSearchFilter">(sAMAccountName={0})</Set>
<Set name="ldapUserDn">nxlog</Set>
<Set name="ldapPassword">PASSWORD</Set>
Below is another example showing how to configure an additional filter for the
search function, in this case using nested groups. This example is also from a
working Active Directory setup, which you can tell from the use of
sAMAccountName for user search settings in this and the previous example.
<Set name=”ldapUserSearchFilter”>
  (&(sAMAccountName={0})(memberOf:1.2.840.113556.1.4.1941:=CN=NXLog_Admins,OU=Admin Groups,OU=Level1,dc=domain,dc=local))
</Set>
LDAPS Configuration
To use LDAP over SSL, your LDAPS certificate trust store must be imported into
the JRE’s key store, using the keytool command:
keytool -keystore <PATH_TO_JRE>/lib/security/cacerts -import -alias \
certificate -file <PATH_TO_CERTIFICATE>/certificate.cer
After updating the key store, ensure the protocol in jetty-env.xml is
changed from ldap:// to ldaps://.
|
For troubleshooting the LDAP configuration, review /opt/nxlog-manager/log/nxlog-manager.log.
|
Audit Trail
NXLog Manager retains a chronological record of all events (processed and internal) in what is known as an audit trail.
To access the audit trail, from the main menu go to ADMIN, then click AUDIT TRAIL. The Audit Trail page is displayed.
The page presents a table of events in chronological order. Each row is an event and each column is a field corresponding to the event. The fields include the event date and type, username, manager address, user address and details about the event.
Click any of the column headers to sort the events by that field’s values, in ascending order. Click the column header again to toggle the sort order between descending and ascending.
To toggle display of event details, click the plus symbol in the details field in the corresponding event row.
Typically, there are a large number of event entries. To filer the events list, go to the top of the Audit Trail page and click Filter audit trail. The Filter Audit Trail dialog appears:
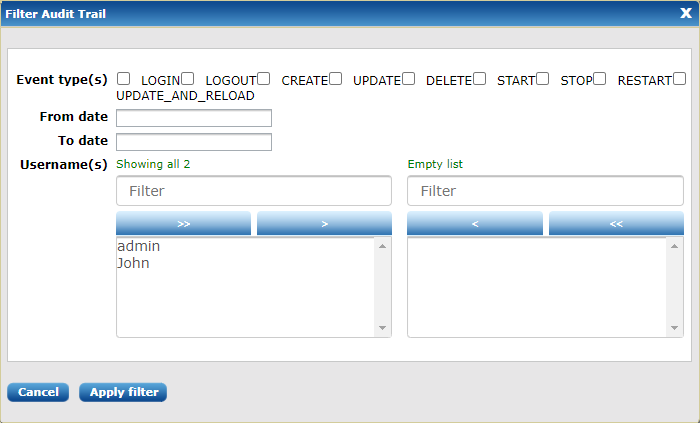
Audit events can be filtered by the following criteria: the event type, the time range in which the event occurred, and the username associated with the event.
Click Apply filter to apply the filtering criteria to the event list. For example, selecting DELETE Event types and applying the filter criteria displays a list similar to the following:
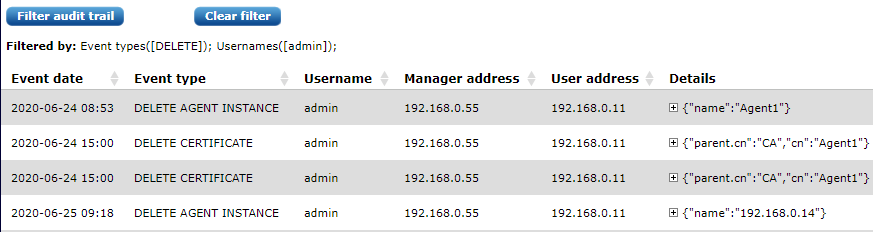
To discard the applied filter criteria, click Clear filter (at the top of the page). The unfiltered list of all audit events is displayed.