
Templates
NXLog templates improve logging management through automatic creation, configuration, tagging, and deployment of agents. This chapter discusses the configuration and management front-endfor templates provided by NXLog Manager.
Template attributes
To view the list of available agent templates, go to the NXLog Manager main menu and click Agents, then on the Agents page, click the Agent templates tab.

From the column headers of this table, the attributes of each template can be viewed. Clicking the settings icon to the left of Template name displays the entire list of attributes. Checkboxes enable the toggling of each attribute’s visibility in this table.
- Template name
-
The unique name of the template. Click the name to load the Template configuration page.
- Description
-
A detailed description of the template.
- Template type
-
Either MASTER or SUB. Subtemplates must be assigned in conjunction with a master template.
- Connection address
-
The IPv4 or IPv6 address of the device running NXLog agents and associated with the template configured for connection with NXLog Manager. Not available when the template is Unmanaged.
- Connection port
-
The connection port of the device running NXLog agents and associated with the template configured for connection with NXLog Manager. Not available when the template is unmanaged.
- Created
-
The date and time the template was added.
- Last modified
-
The date and time the template was last edited.
Template actions
At the bottom of the list of templates there is a menu of actions used to manage the selected template(s).
- Add
-
Create a new template and open the editing dialog.
- Export
-
Save the template configuration to an external file. Similar to Export agent configuration, this action exports template configurations.
- Import
-
Read a template configuration from an external file. Similar to Import agent configuration, this action imports template configurations.
- Delete
-
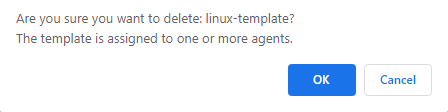
Delete the selected template(s).
Deleted templates must be unassigned from the agents belonging to it. If there are any, a confirmation dialog will appear:
- Clone
-
Create an exact copy of the selected template.
- Create agents
-
Create agents and automatically assign the selected template to them.
Creating templates
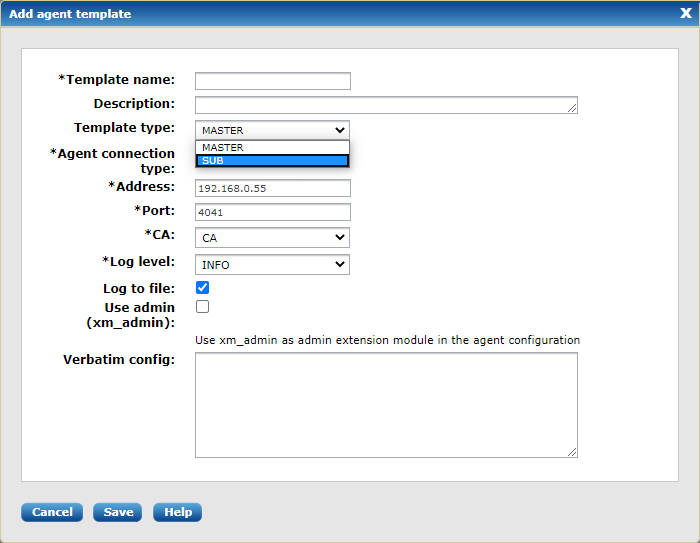
When creating a new template via the Add agent template menu (AGENTS > Agent Templates > Add), it should be decided whether the template will act as a MASTER (independent) or SUB (dependent) template. When applying templates to agents, it is possible to select a master template by itself, or with one or more subtemplates. Although a subtemplate cannot be applied to agents without a master template, subtemplates are not directly linked to any single master template, which offers more flexibility. Within the context of template creation and configuration, subtemplates are only "linked" to a master template when they are being applied to an agent.
Planning
Some planning and best practices are needed when implementing this two-tier Master-Subtemplate(s) approach. One consideration is the creation and selection of subtemplates so that configuration elements are not duplicated or are in conflict with each other across the selected templates, and that instance names remain unique across templates that are intended to be used together.
The use cases and practices are almost endless and will differ depending on the logging configuration and the environment it is applied in. Generally, a master template should employ general and global directives common to the subtemplates that will be linked to it. Any modules and routes it may define should be more widely used than those defined in the subtemplates, which by their nature will handle more specialized logging.
Another approach might be to use master templates to include only global/ general directives and extension modules that are required by the input and output modules of subtemplates that would be linked to them.
Migrating to managed configurations
When NXLog agents are deployed without the central log management
system, configurations are stored by default in the nxlog.conf file. When
managed by NXLog Manager they are appended to the managed.conf file. For
this reason, care should be taken that any directives, variables, or module
instances in nxlog.conf are not duplicated, overwritten or are in conflict
with those in the new templates to be pushed to managed.conf.
Configuring a new template
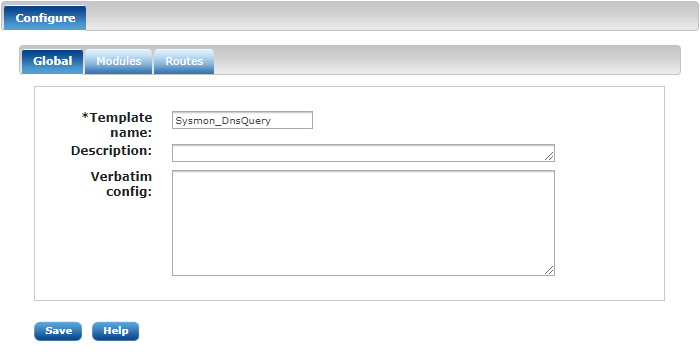
Once the template has been created and saved, it appears in the list of templates and can be opened for additional configuration, which reveals the Configure menu. The first three tabs in this view are Global, Modules, and Routes, which underscores the modular nature of the template design process.
- Global
-
This tab reveals a form which allows modification of most of the template attributes along with the Verbatim config field. For subtemplates, the only editable fields are Template name, Description, and Verbatim config:
At the global level, the only configuration elements typically defined here would be global directives or general directives which are defined in the Verbatim config input field.
- Modules
-
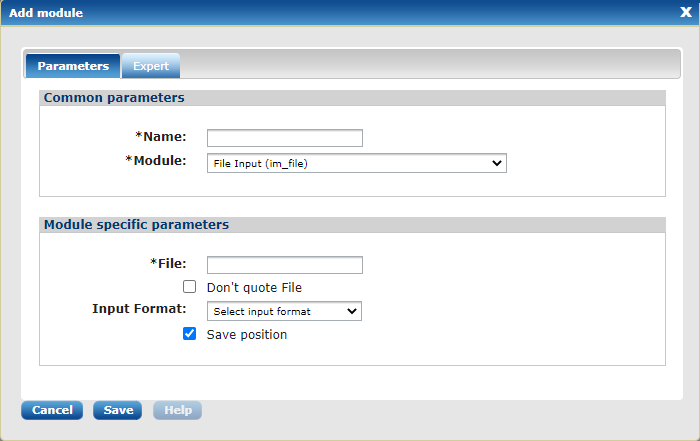
This tab provides the ability to interactively create Input, Output, Extension, and Processor module instances. Clicking the Add button, reveals a popup menu with two tabs: Parameters and Expert.
-
Parameters has two input sections: Common parameters and Module specific parameters.
-
Common parameters with two input fields:
-
Name: The mandatory, user-specified instance name
-
Module: A dropdown list of all available modules
-
-
Module specific parameters: The number and type of input fields varies widely based on the module selected from the Module dropdown list.
-
-
Expert allows the definition of individual Exec statements which can be entered interactively, line-by-line with the Add execution button.
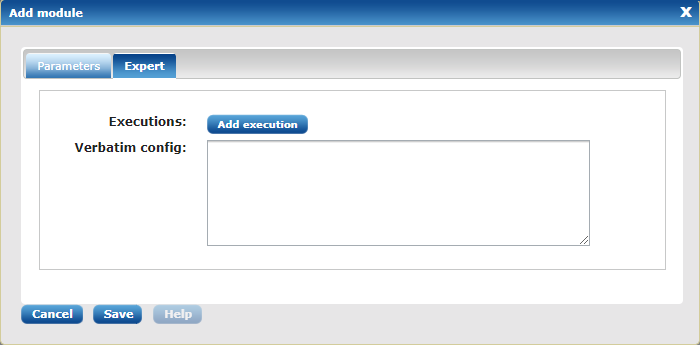
Clicking Add execution reveals a new input field and two buttons: Verify and Delete.
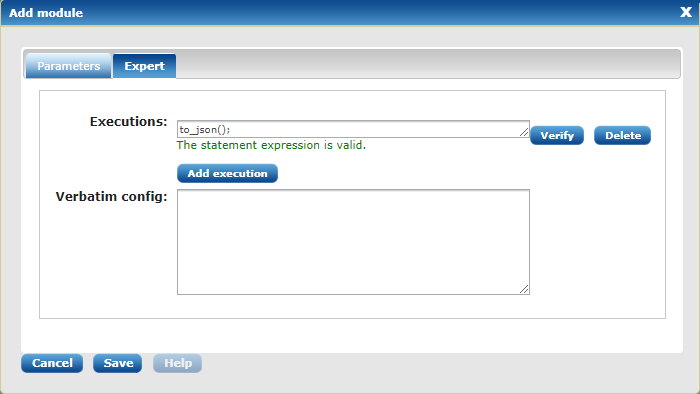
Verify tests the syntax and validity of the Exec statement. The other method of adding Exec statements within this popup menu is Verbatim config, which is a better choice for adding longer, multi-line Exec statements or Exec blocks. Any configuration elements added in the Verbatim config will be appended to those already defined in the Module specific parameters section. For instance, the setting Save position from the File (im_file) module shown above, is checked by default. If the directive
SavePos TRUEis added to the Verbatim config, the configuration generated will contain a duplicate entry for this directive.A local installation of the NXLog agent on the NXLog Manager host is required for using the Verify button. If an instance was defined in the Verbatim config and is referenced by its name in an interactively created module, Verify will display an error because it cannot find the instance. However, the new module can be saved and will be functional. An example of referencing an external instance by its name can be seen in the Exec statement that calls rewrite→process();shown in this example (line 24) of the Rewrite (xm_rewrite) module.
-
- Routes
-
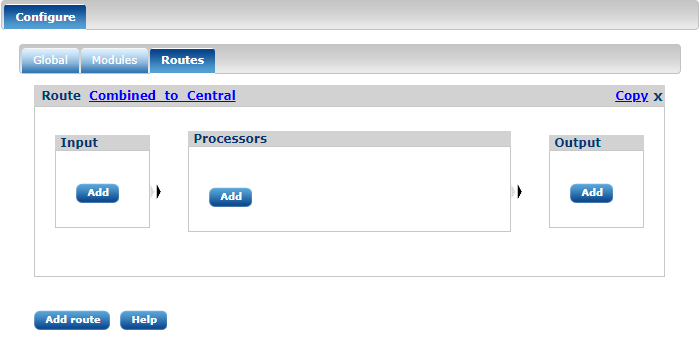
This tab provides the ability to quickly create routes using the modules that have been defined. Clicking Add route opens a popup with two input fields: Name and Priority. Once a name has been chosen and saved, the new route can be defined via Add buttons for Input, Processors, and Output modules:
Once modules have been defined, they can be selected via dropdown lists. Otherwise, the interface facilitates the creation of modules if none are defined.

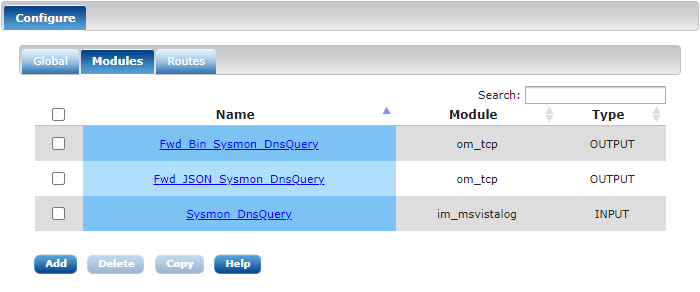
This example illustrates how a Sysmon DnsQuery agent template can be created.
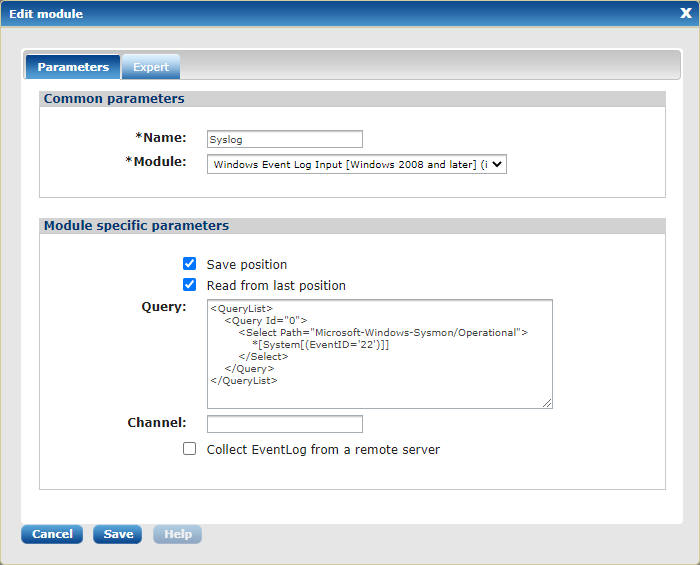
Normally, directives in an NXLog configuration need to fit on a single
line. Long lines need to be split and escaped with a backslash (\) into
"continuations" of the first line. In the Event Log for Windows 2008/Vista/later (im_msvistalog) view of
Module specific parameters, line-splitting and escaping automatically handled
by NXLog Manager for multi-line entries in the Query field. However, if
this instance had required multiple queries, the approriate
QueryXML block would need to be entered in the
Verbatim config input field on the Expert tab instead.
The DnsQuery events are collected by the single input module. Two output modules prepare the logs for formatting and forwarding to a centralized log collection server.
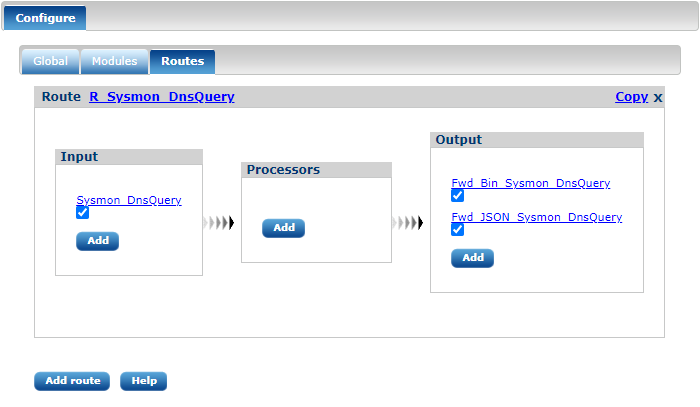
A single route sends events to two output modules for formatting the logs to JSON and Binary format streams as they are forwarded to a centralized log collection server.
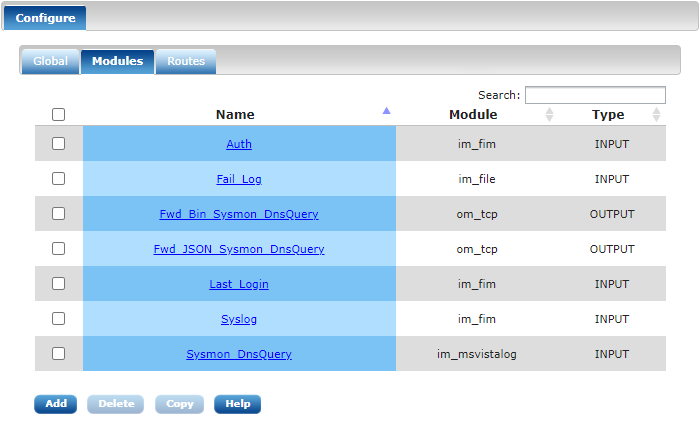
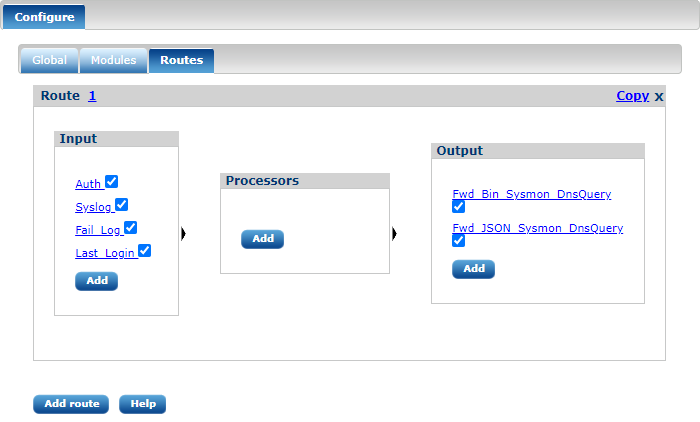
In this example, specific log sources relating to remote access and authentication have been defined as separate input modules. The route combines the collected events and sends them to a JSON-formatted output stream and a binary-formatted output stream.
Managing templates
As templates are used for grouping NXLog agent’s configuration, template configuration is almost the same as the agent configuration. The only difference is no certificate settings are needed as certificate settings are specific to the agents themselves.
Tags
NXLog templates and agents can be managed by tags. Tags have role and user access permissions. To list them for a template, click on Tags tab under the Template configuration page:
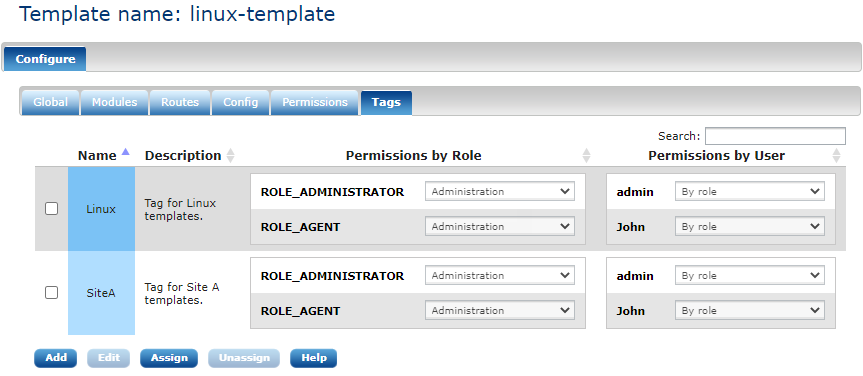
This list contains the following information:
Tag data
- Name
-
The unique name of a tag.
- Description
-
A detailed description of the tag.
- Permissions by Role
-
Shows the access permissions of each role allowed to manage NXLog agents.
- Permissions by User
-
Shows the access permissions of each user allowed to manage NXLog agents.
Tag actions
On the bottom of the list there is a menu of actions which can be used to manage the selected tag(s).
- Add
-
Add a new tag.
- Edit
-
Edit a tag.
- Assign
-
Assign (or unassign) tags to this template.
To add a new tag to the system (and in parallel assign to this template), click on the Add button. An Add tag dialog will appear:

Fill in the Name and optional Description for this tag. Each new tag is created with default access permissions, is assigned to this template and will appear on the list:

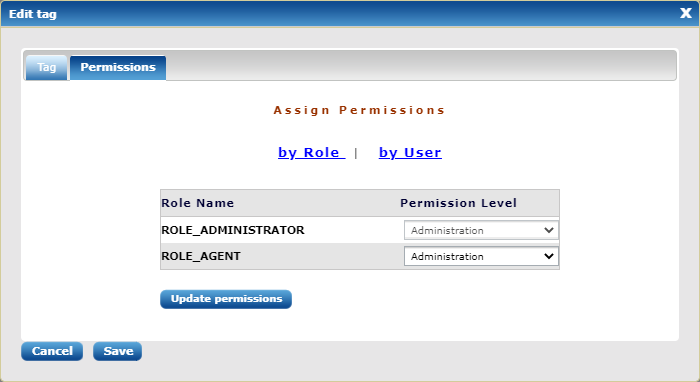
A tag can be then edited by selecting it and clicking the Edit button. The Edit tag dialog has two tabs—Tag and Permissions:
If permissions need to be changed, click the Permissions tab, then by User:
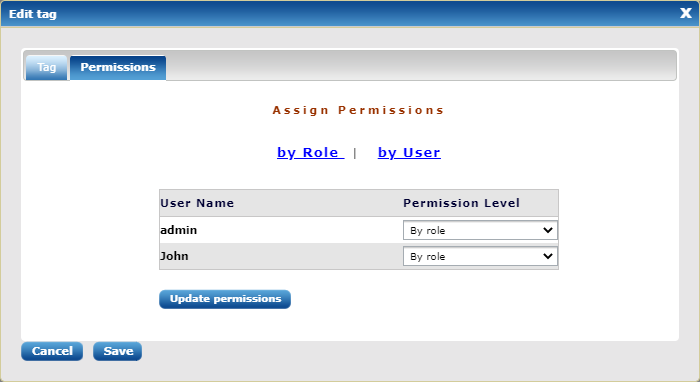
After editing permissions, click Update permissions, then Save.
If tags needed to be assigned/unassigned to the current template, click on the Assign button on the tag list page. The following dialog will appear:
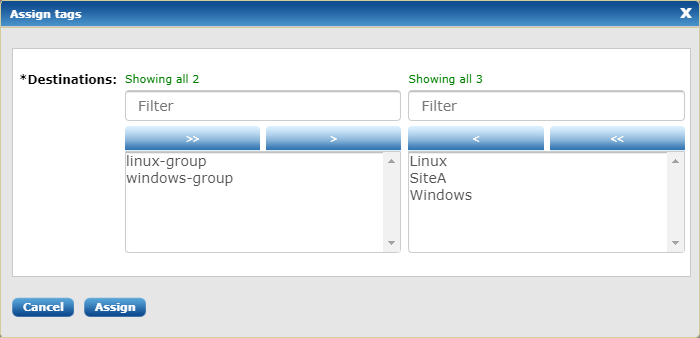
Select the tags needed from the multi-select box and Assign them.