
Agent Configuration
To load the agent configuration form, click the Configure button on the agent list page or the Configure tab at the top of the agent page. The Global tab is contained here.
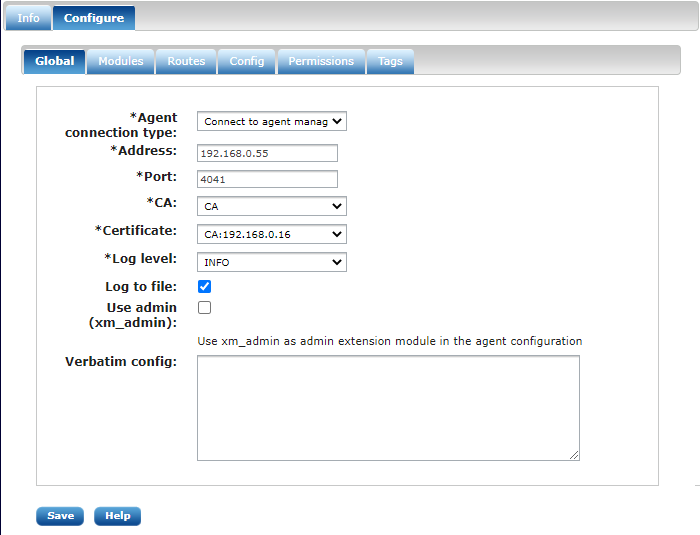
The list of parameters are explained below.
- Agent name
-
Set this to the certificate subject name. It is automatically filled out when the agent has connected and was automatically added.
- Connection type
-
- Unmanaged
-
Set the connection type to Unmanaged if you do not want to administer the agent remotely over a secure connection.
- Listen (accept agent manager connection)
-
The NXLog agent will listen on the IP address and port for incoming SSL connections. You must also configure the agent manager to initiate connection to the agents.
- Connect to agent manager
-
The NXLog agent will initiate the connection to the agent manager.
- Address
-
The address where the agent should connect to or where the agent is listening on, depending on how the Connection type is configured.
- Port
-
The port number where the agent should connect to or where the agent is listening on, depending on how the Connection type is configured.
- Certificate
-
The certificate that will be presented by the NXLog agent during the mutual authentication phase when the connection is established with the agent manager. The agent manager will check whether the agent certificate has been signed with the CA configured on the Agent Manager settings tab.
- Loglevel
-
The log level to use when sending internal messages to the log file and the im_internal input module.
- Log to file
-
Enable this if you want to use a local
nxlog.logfile where the internal events of the NXLog agent are written. This method is more efficient and error resistant than using im_internal and it also works with DEBUG log level.
- Verbatim config
-
Verbatim configuration text for this agent. This configuration will be put in the
managed.conffile as it is.
The list of modules can be managed independently regardless of the route they belong to. The following screenshot shows an example list of modules.
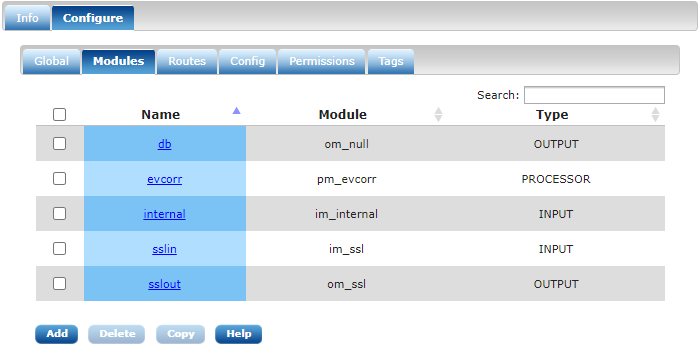
Click the Add button to add a new module. The module configuration dialog will pop up. To remove a module, click the checkbox after the module’s name. Modules which are already part of a route cannot be removed. Go to the Routes tab to remove or add modules to a route. On the other hand modules not part of a route can only be removed on this list. Configuration will not be generated for modules which are not part of a route. Click on copy to copy this module configuration to other agents. A popup will appear to select them. Click on the module’s name to modify its configuration.
To configure the flow of log data in the NXLog agent, click the Routes tab. A freshly created agent does not have any routes. Click the Add route button to add a route.
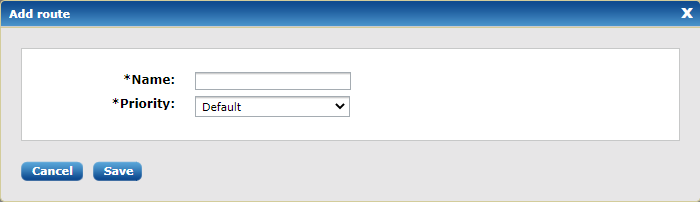
Enter the name and select the priority. Data will be processed in priority order among routes. Lower gets processed first. This is only useful if you have more routes which contain different input sources. Select default if you do not wish to assign a priority value.
After the route is added, you can now add modules to it. A route requires at least one input and one output module. The following screenshot shows an example of a route with one module for each type.
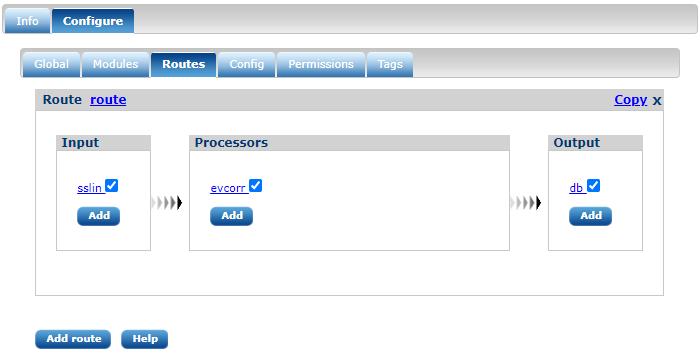
Click the Add button inside the input/processor/output block to add a module instance. The module configuration dialog will pop up. If there is already an existing module instance, you will be able to select that also. It is possible to add more module instances to each block. To remove a module, uncheck the checkbox after its name. The module instance is only removed from the route. To fully delete it, click the Modules tab and remove the module.
As with modules, there is an option to copy an entire route to other agents. Click on Copy link on the top right of a route to select one or more agents to copy to.
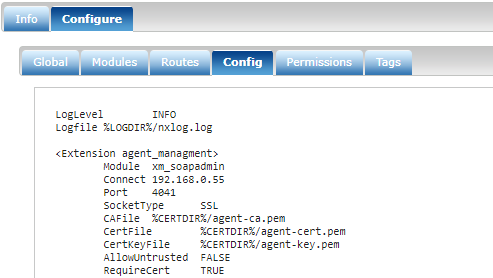
The last tab contains the generated NXLog configuration which will be pushed to the NXLog agent when clicking on Update config as shown in the following screenshot.
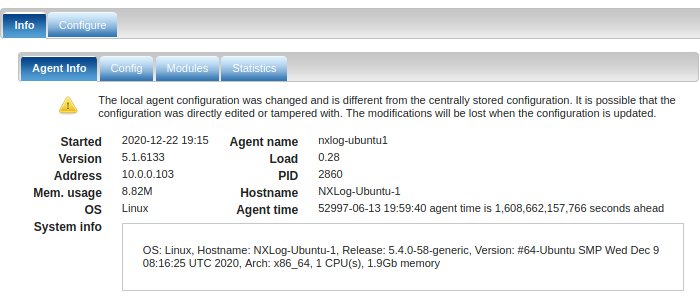
Agent configuration mismatch
When using the NXLog Manager, agent configuration should be modified from within the manager user interface. In cases where the configuration is modified by editing the agent configuration file directly, a warning will be displayed on the agent information page as shown in this screenshot:
Clicking the Warning icon displays a dialog highlighting the differences in the configuration.
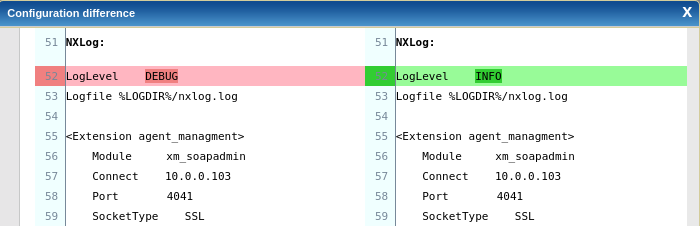
The left pane shows the local configuration of the agent, while the right pane shows the configuration as saved by the NXLog Manager.
Manual modifications will be lost once the agent configuration is updated by the NXLog Manager. When this happens, the differences should be analyzed and if there are changes that should be retained, they need to be applied to the configuration saved by the NXLog Manager. For more information on how to configure agents in NXLog Manager see the Agent Configuration documentation above.