
Hardening NXLog Agent on Windows
On Windows, the NXLog Agent installer always sets up the NXLog Agent service to run under the Local System account. However, you might want to run it under a dedicated service account, especially if you also use the system account to run other processes. This approach can improve security by limiting the privileges that the NXLog Agent requires to run.
For the remainder of the article, we use the svc-nxlog service account name, but you can use any name that is allowed.
| In environments managed by Group Policy, the domain administrator must manage the dedicated user account and its permissions. |
Follow these steps to run the NXLog Agent service under a dedicated service account:
-
Create a new user account:
-
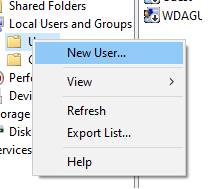
Open the Computer Management console (
compmgmt.msc). -
Expand Local Users and Groups.
-
Right-click Users and click New User.
-
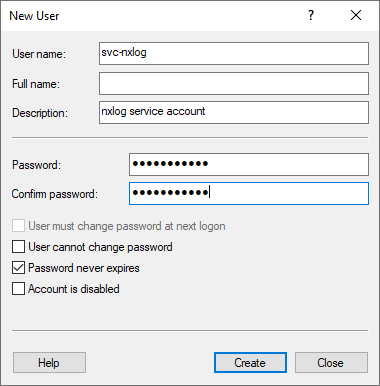
In the New User dialog box, do the following:
-
Enter the user account’s user name, description, and password.
-
Uncheck User must change password at next login.
-
Check Password never expires
-
Click Create.
-
-
-
Update the
nxlogservice user:-
Open the Services console (
services.msc). -
Right-click the
nxlogservice and click Properties.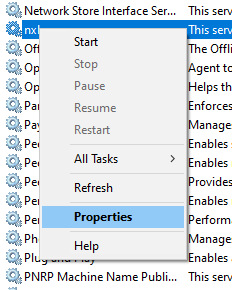
-
-
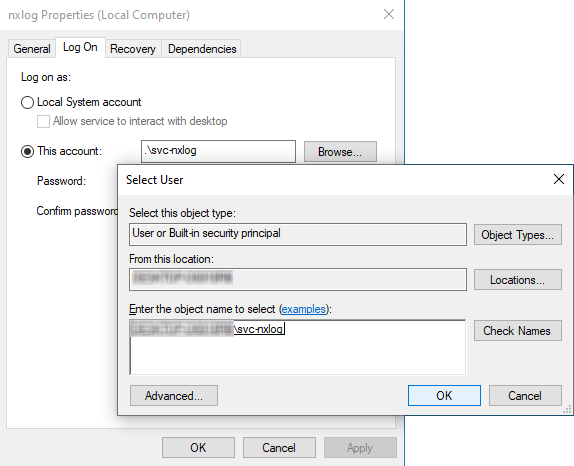
On the Log On tab, click This Account, select the user account that you created (
svc-nxlog), and click OK.The operating system warns you that you must restart the service.
-
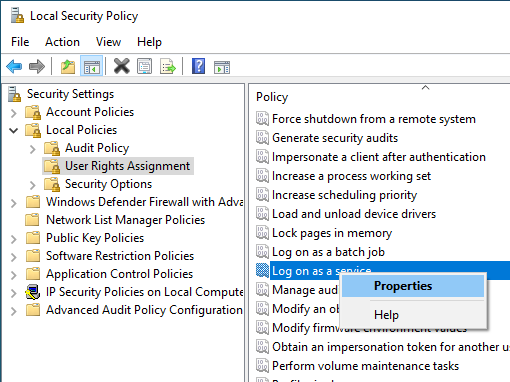
Add the user account to the required local policies:
-
Open the Local Security Settings console (
secpol.msc). -
Expand Local Policies > User Rights Assignment in the left pane.
-
Do the following for the Log on as a service and Manage auditing and security log policies:
-
Right-click the policy name and click Properties.
-
Click Add User or Group and select the new user account.
The user account appears in the list.
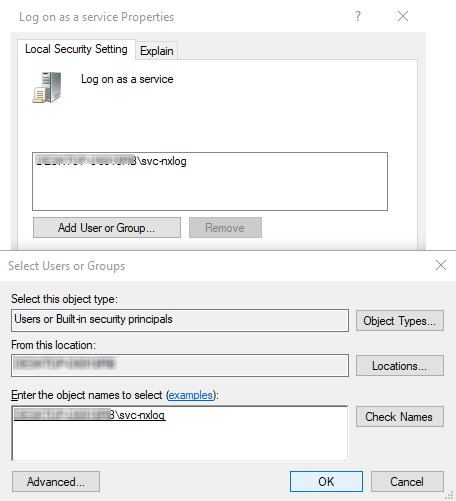
-
Click OK.
-
-
-
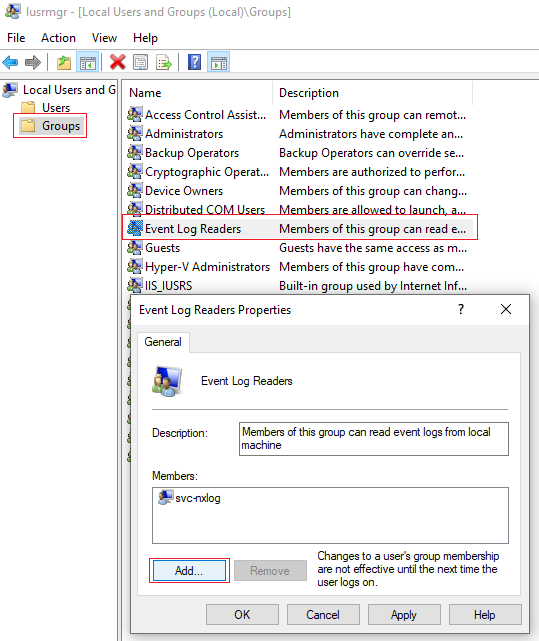
Add the user account to the required groups:
-
Open the Local Users and Groups console (
lusrmgr.msc). -
Click Groups and add the user account to these groups:
- Event Log Readers
-
This group is required for collecting events from the Security channel.
- Performance Monitor Users
-
If you manage the agent from NXLog Platform, also add the user to this group.
-
-
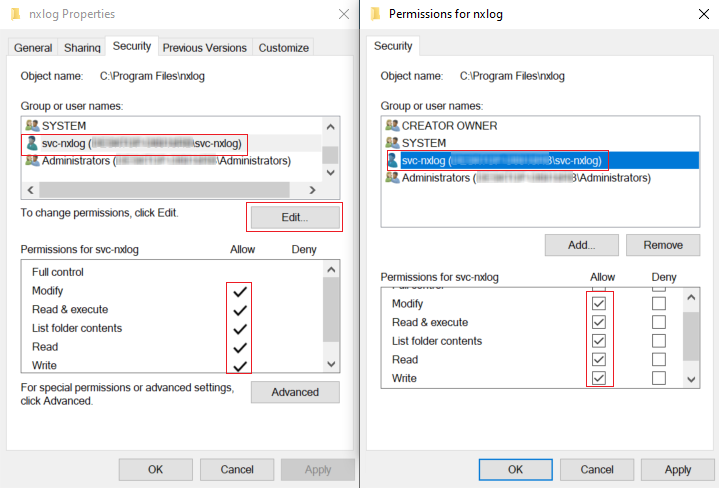
Edit the permissions of the NXLog Agent folder:
-
In Windows Explorer, browse to the NXLog Agent installation directory (
C:\Program Files\nxlogby default on 64-bit systems), right-click it, and click Properties. -
On the Security tab, click Edit and add the user account to the Group or user names list.
-
Check Allow for the following permissions:
-
Modify
-
Read & Execute
-
List Folder Contents
-
Read
-
Write
-
-
Click OK.
-
Click Advanced.
-
In the Advanced Security Settings for nxlog window, do the following:
-
Click the Enable Inheritance button. If the button already reads Disable Inheritance, skip this step.
-
Check Replace all child object permission entries with inheritable permission entries from this object.
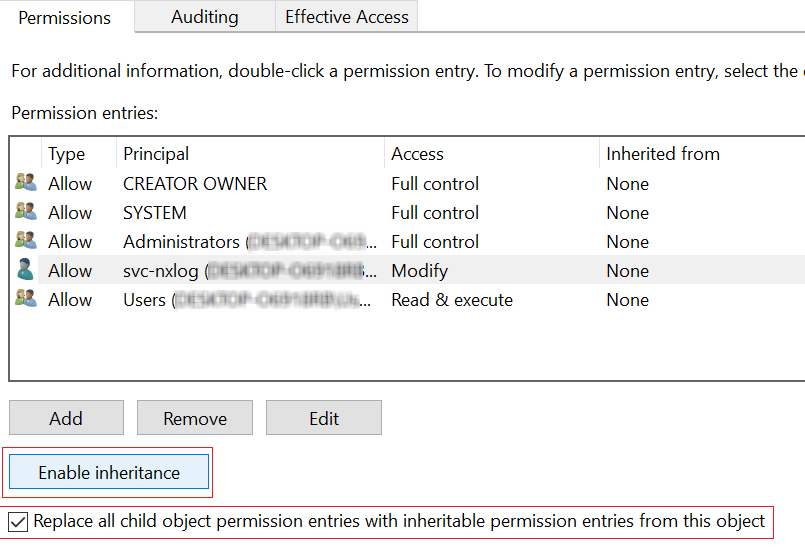
Windows can sometimes fail to propagate the folder permissions to all child objects, resulting in the following error during the NXLog Agent service startup:
Windows could not start the nxlog service on Local Computer.
Error 1053; The service did not respond to the start or control request in a timely fashion
If you see this error, try repeating the step or manually changing the folder’s permissions.
-
-
Click OK.
-
-
In the Services console (
services.msc), right-click thenxlogservice and select Restart.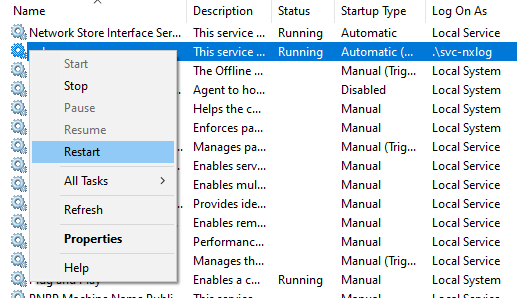
-
Check the NXLog Agent log file for startup errors.
A successful startup should look like this:
nxlog.log2024-07-08 11:36:09 INFO [CORE|main] nxlog-6.2.9212 (0330cd3e3@REL_v6.2) started on Windows 2024-07-08 11:36:09 INFO [CORE|main] ID: 60c79978-3d00-11ef-8000-9568355e9ffd, signed 2024-07-08 11:36:09 INFO [xm_admin|admin] connecting to agents.tenant.example.com(10.0.0.32):5515 2024-07-08 11:36:09 INFO [xm_admin|admin] tcp connection established with agents.tenant.example.com(10.0.0.32):5515
|
On some Windows systems, this procedure may result in one of the following access denied errors when attempting to access Windows Event Log: WARNING [im_msvistalog|windows] failed to subscribe to msvistalog events,access denied [error code: 5]: Access is denied. or WARNING [im_msvistalog|windows] ignoring source as it cannot be subscribed to (error code: 5) See the Access denied to a Windows Event Log channel troubleshooting section for how to resolve this error. |